Firebase ML Kit's text recognition APIs can recognize text in any Latin-based character set. They can also be used to automate data-entry tasks such as processing credit cards, receipts, and business cards. In this tutorial, we will be building a Non-Expo React Native application to recognize text from an image using Firebase's ML kit.
Cloud Vision APIs allow developers to easily integrate vision detection features within applications, including image labeling, face, and landmark detection, optical character recognition (OCR), and tagging of explicit content. Cloud Vision Docs.
Firebase
Firebase is a platform developed by Google for creating mobile and web applications. It was originally an independent company founded in 2011. In 2014, Google acquired the platform and it is now their flagship offering for app development.
Prerequisites
To proceed with this tutorial:
You will need a basic understanding of React & React Native.
You will need a Firebase project with the Blaze plan enabled to access the Cloud Vision APIs. You can check out the pricing for the Cloud Vision API from here.
Overview
We'll be going through these steps in this article:
- Development environment.
- Installing dependencies.
- Setting up the Firebase project.
- Setting up Cloud Vision API.
- Building the UI.
- Adding media picker.
- Recognize text from the Image.
- Additional configurations.
- Recap.
You can take a look at the final code in this GitHub Repository.
Development environment
IMPORTANT - We will not be using Expo in our project.
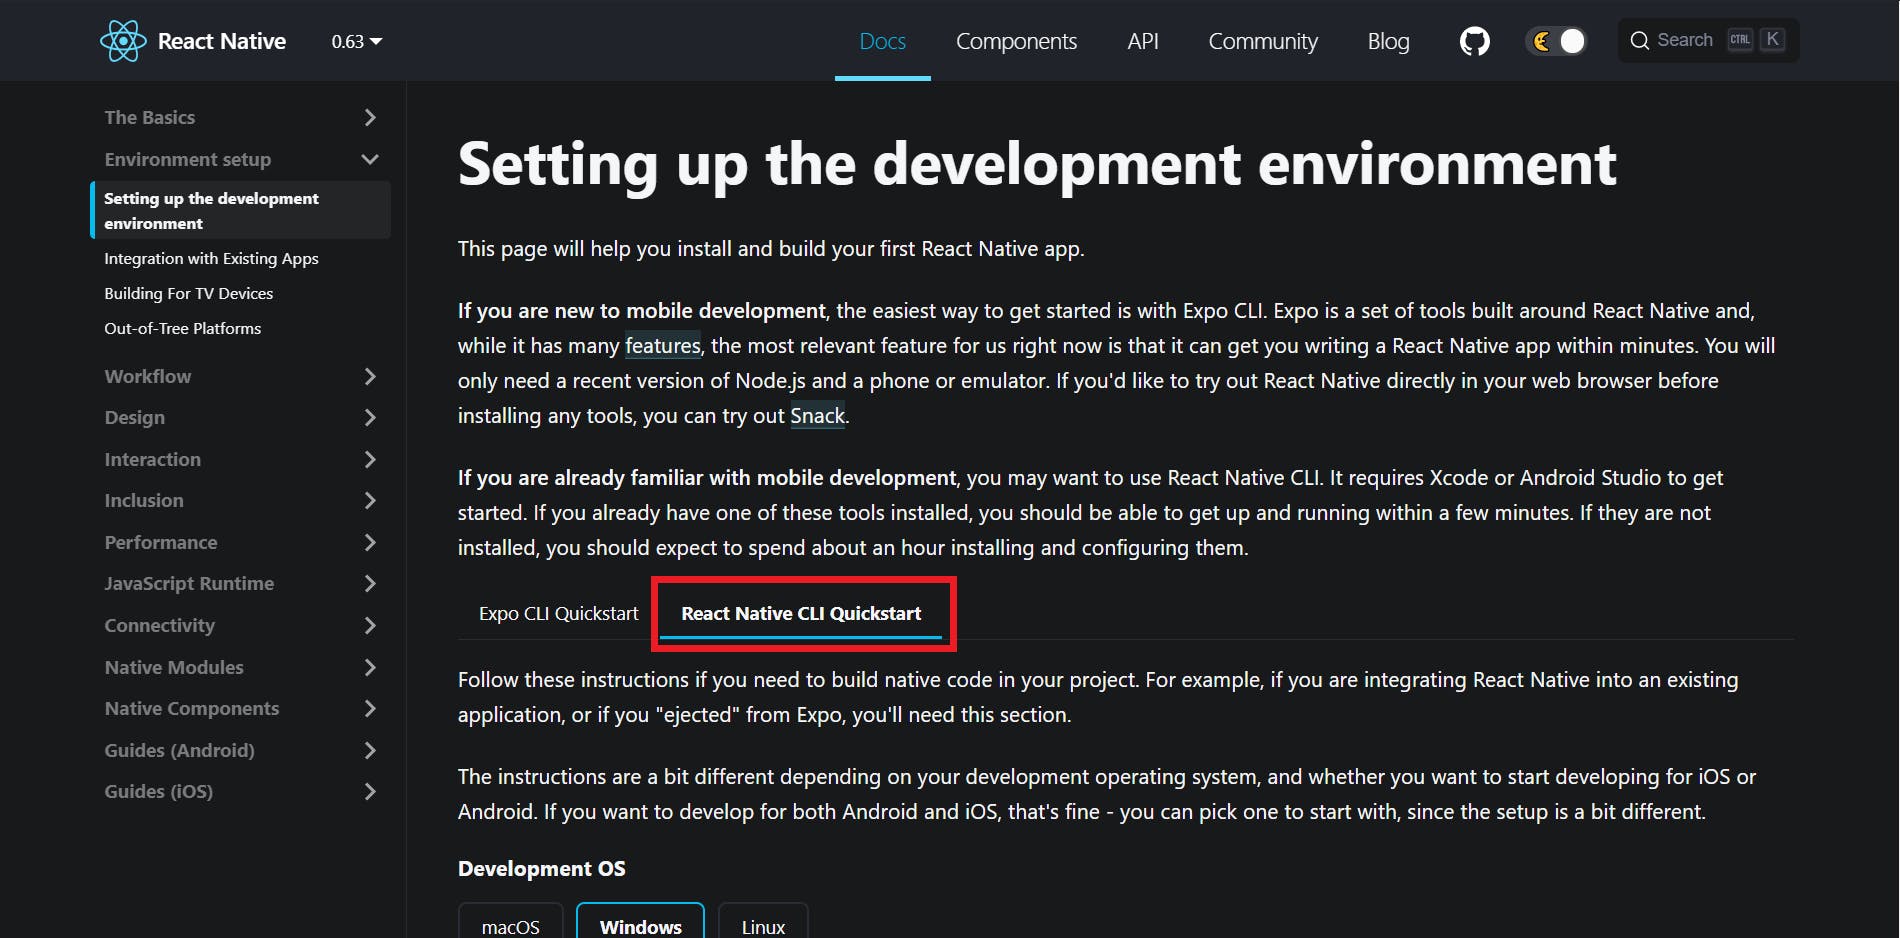
You can follow this documentation to set up the environment and create a new React app.
Make sure you're following the React Native CLI Quickstart, not the Expo CLI Quickstart.
Installing dependencies
You can install these packages in advance or while going through the article.
"@react-native-firebase/app": "^10.4.0",
"@react-native-firebase/ml": "^10.4.0",
"react": "16.13.1",
"react-native": "0.63.4",
"react-native-image-picker": "^3.1.3"
To install a dependency, run:
npm i --save <package-name>
After installing the packages, for iOS, go into your ios/ directory, and run:
pod install
IMPORTANT FOR ANDROID
As you add more native dependencies to your project, it may bump you over the 64K method limit on the Android build system. Once you reach this limit, you will start to see the following error while attempting to build your Android application.
Execution failed for task ':app:mergeDexDebug'.Use this documentation to enable multidexing. To learn more about multidex, view the official Android documentation.
Setting up the Firebase project
Head to the Firebase console and sign in to your account.
Create a new project.
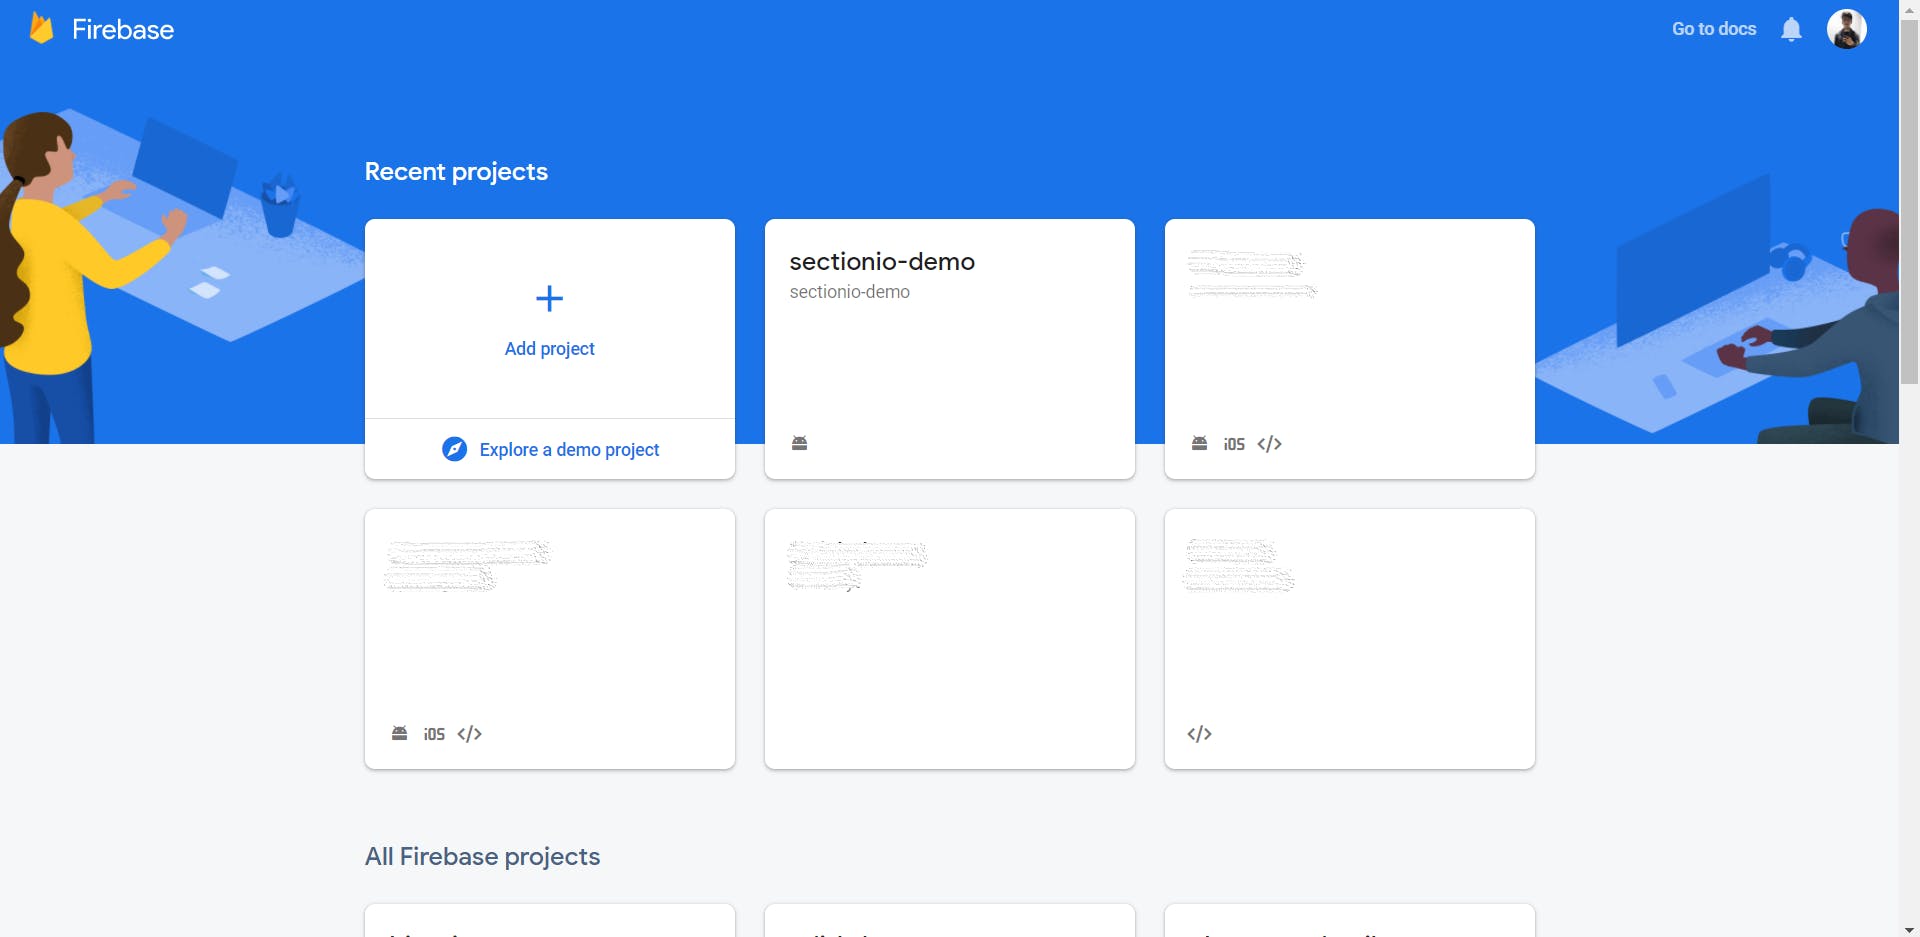
Once you create a new project, you'll see the dashboard. Upgrade your project to the Blaze plan.
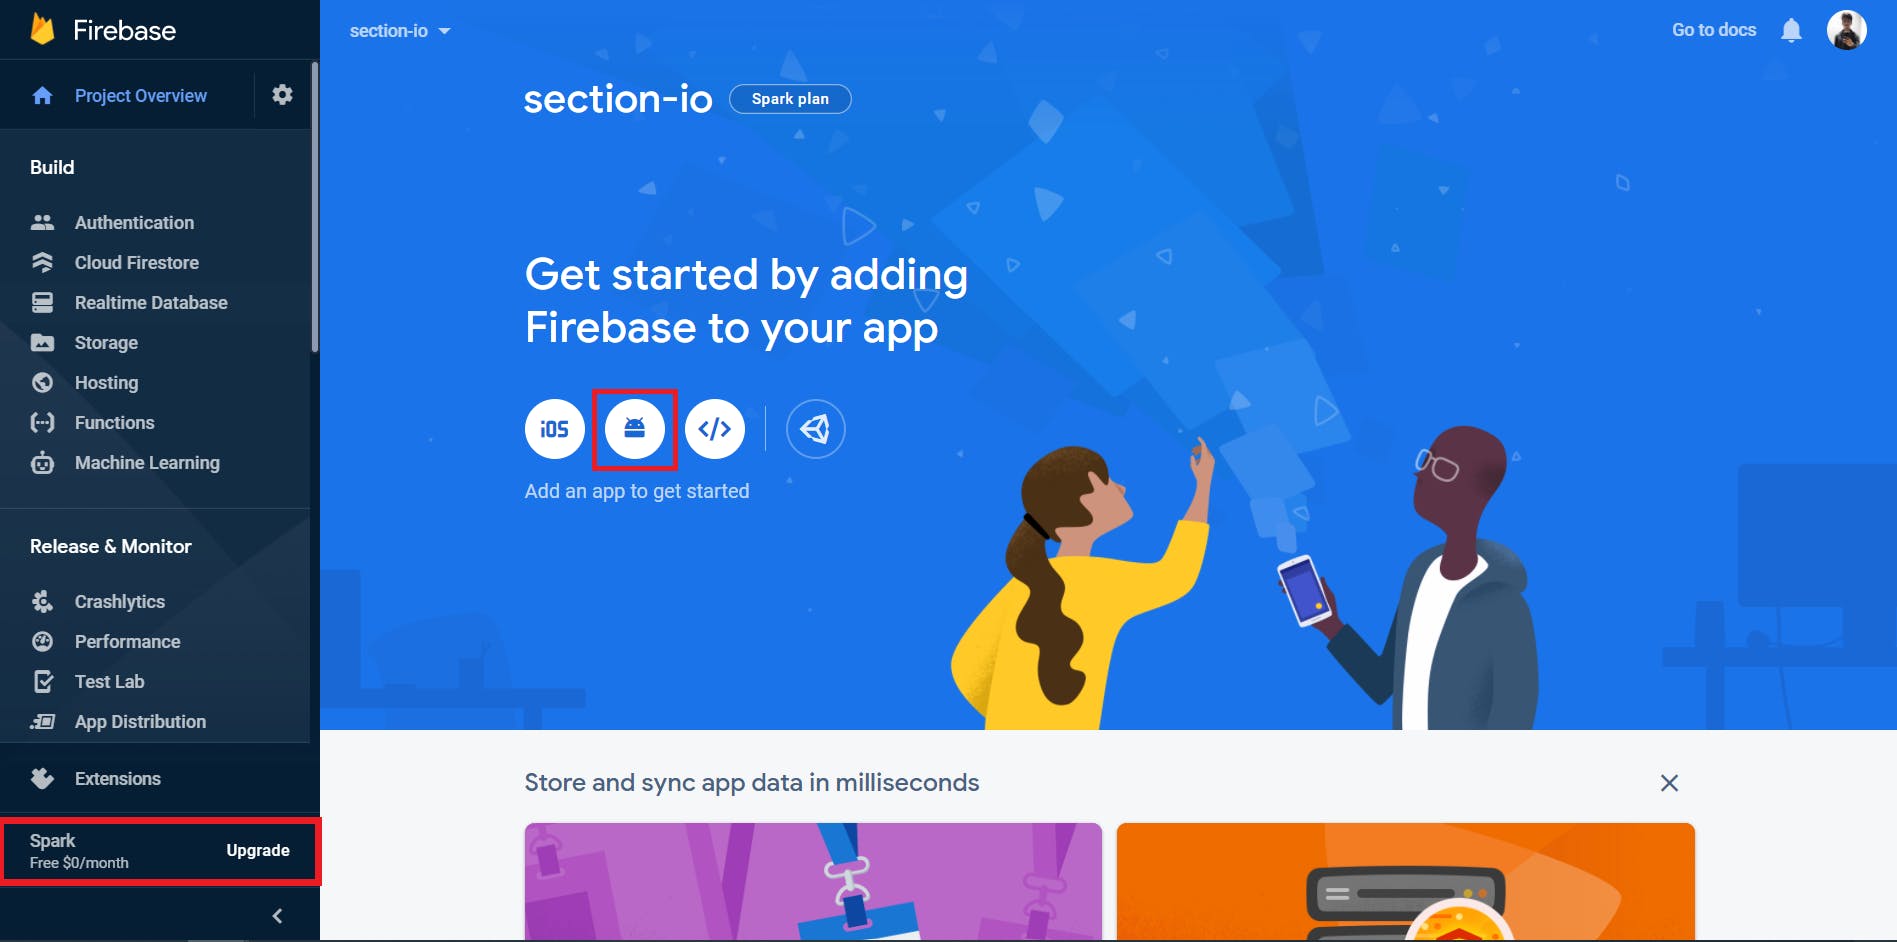
Now, click on the Android icon to add an Android app to the Firebase project.
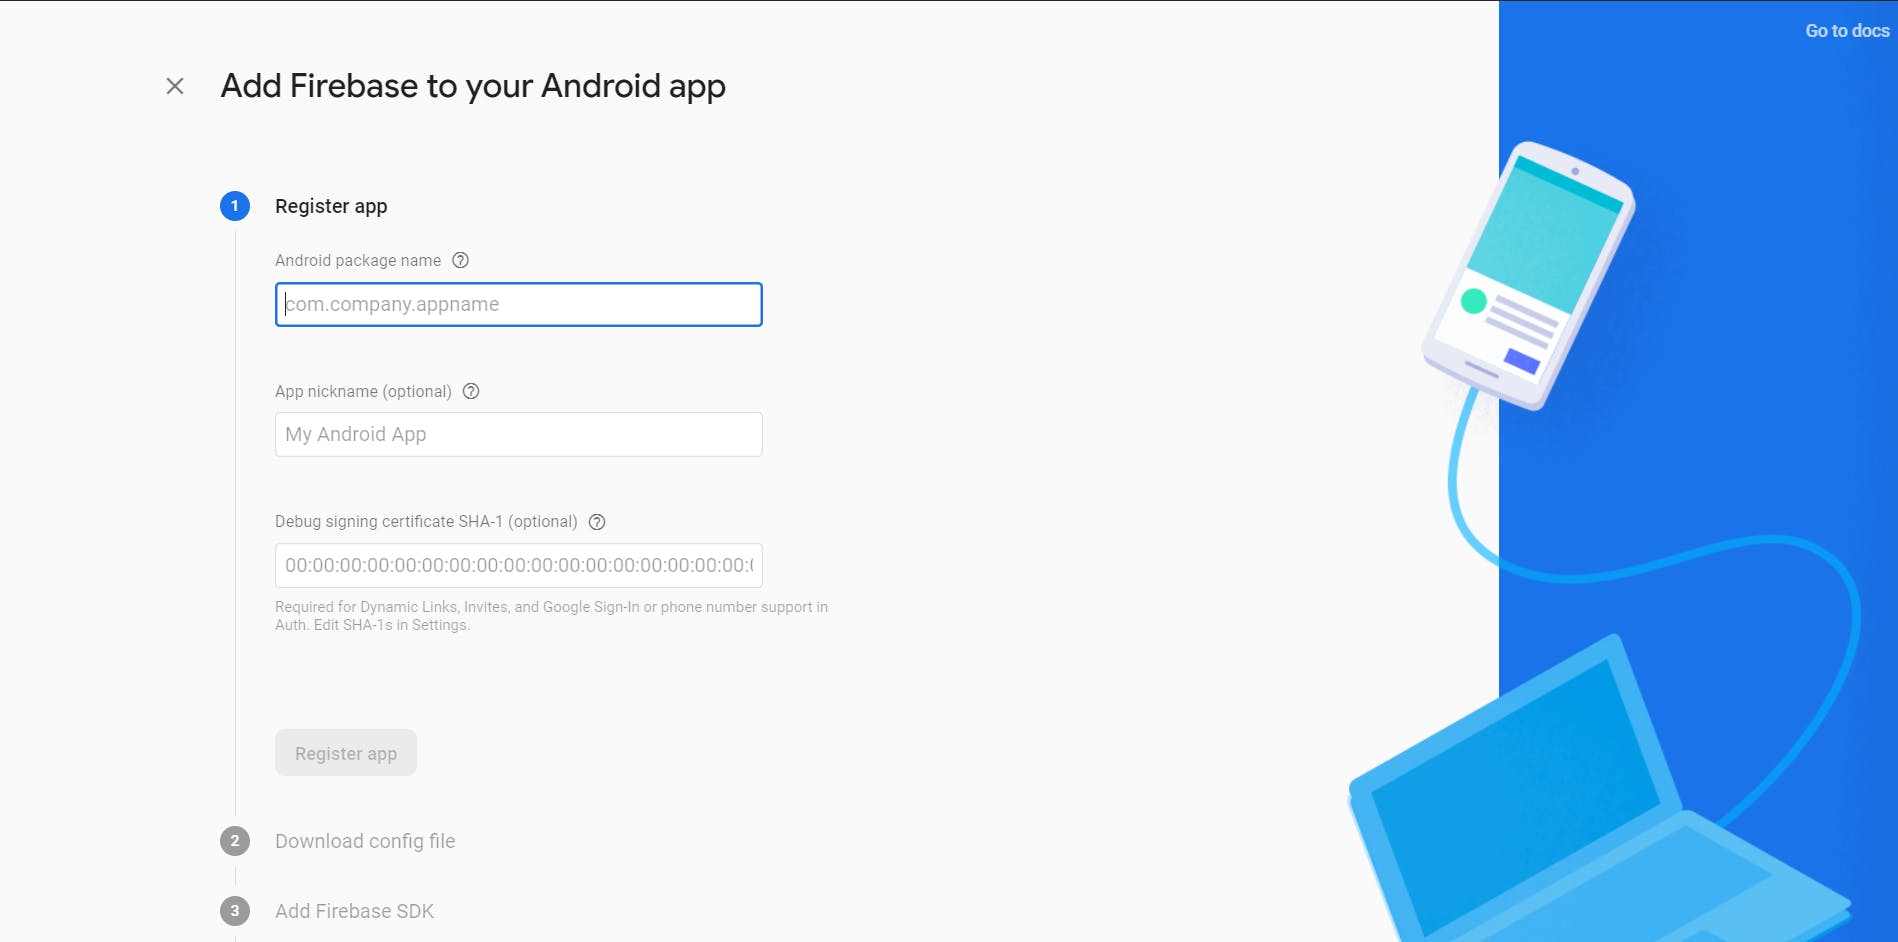
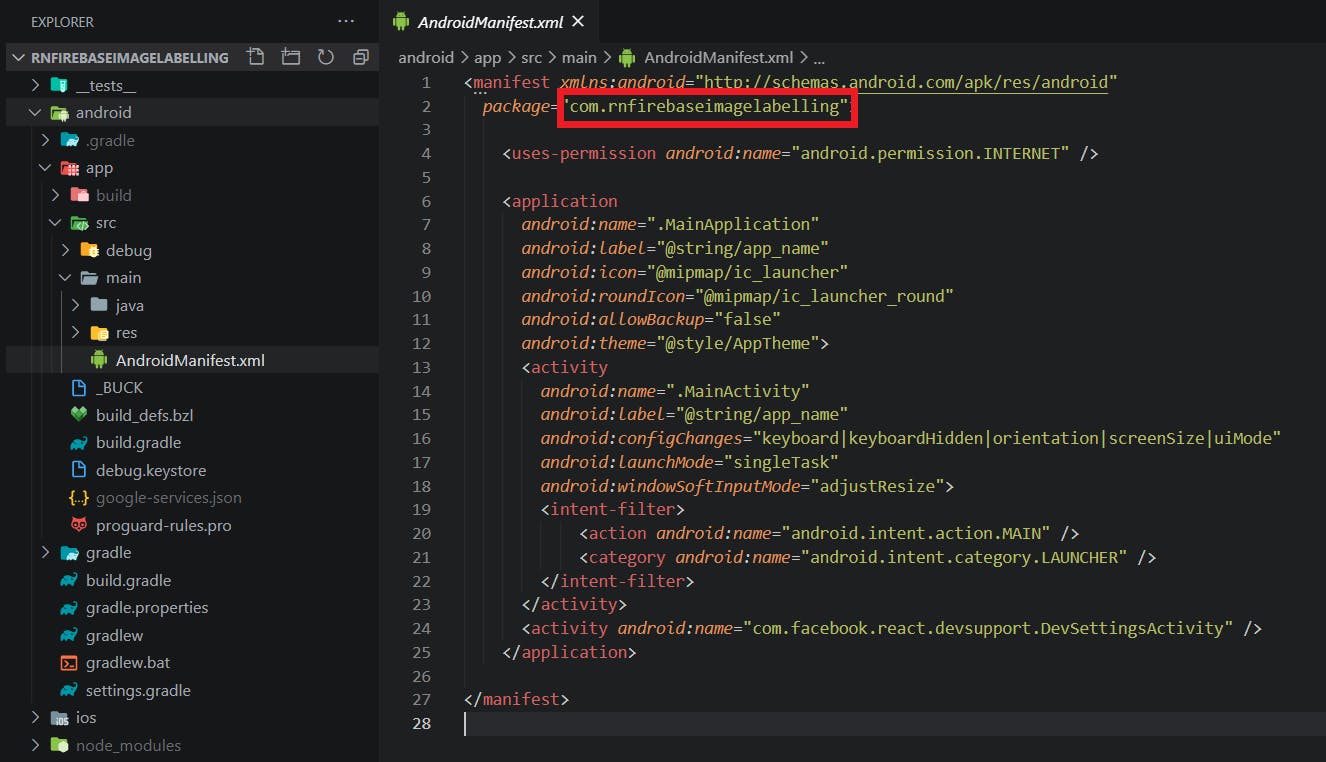
You will need the package name of the application to register the application. You can find the package name in the AndroidManifest.xml which is located in android/app/src/main/.
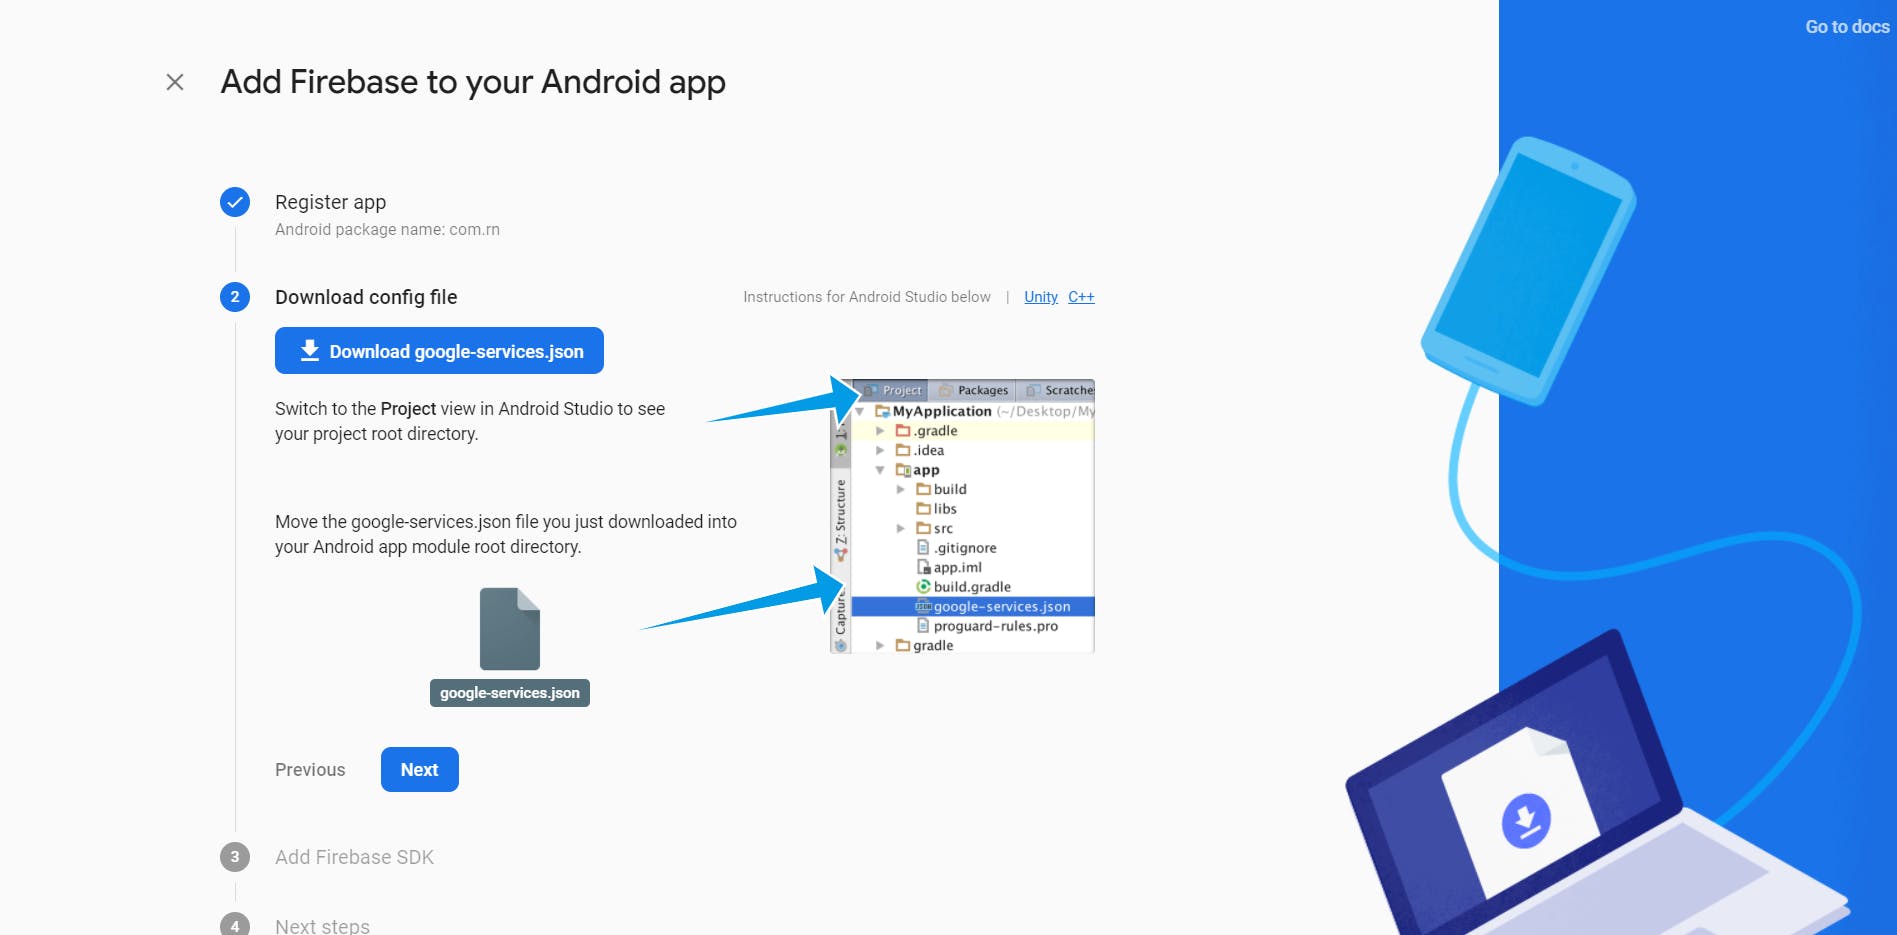
Once you enter the package name and proceed to the next step, you can download the google-services.json file. You should place this file in the android/app directory.
After adding the file, proceed to the next step. It will ask you to add some configurations to the build.gradle files.
First, add the google-services plugin as a dependency inside of your android/build.gradle file:
buildscript {
  dependencies {
    // ... other dependencies

    classpath 'com.google.gms:google-services:4.3.3'
  }
}
Then, execute the plugin by adding the following to your android/app/build.gradle file:
apply plugin: 'com.android.application'
apply plugin: 'com.google.gms.google-services'
You need to perform some additional steps to configure Firebase for iOS. Follow this documentation to set it up.
We should install the @react-native-firebase/app package in our app to complete the set up for Firebase.
npm install @react-native-firebase/app
Setting up Cloud Vision API
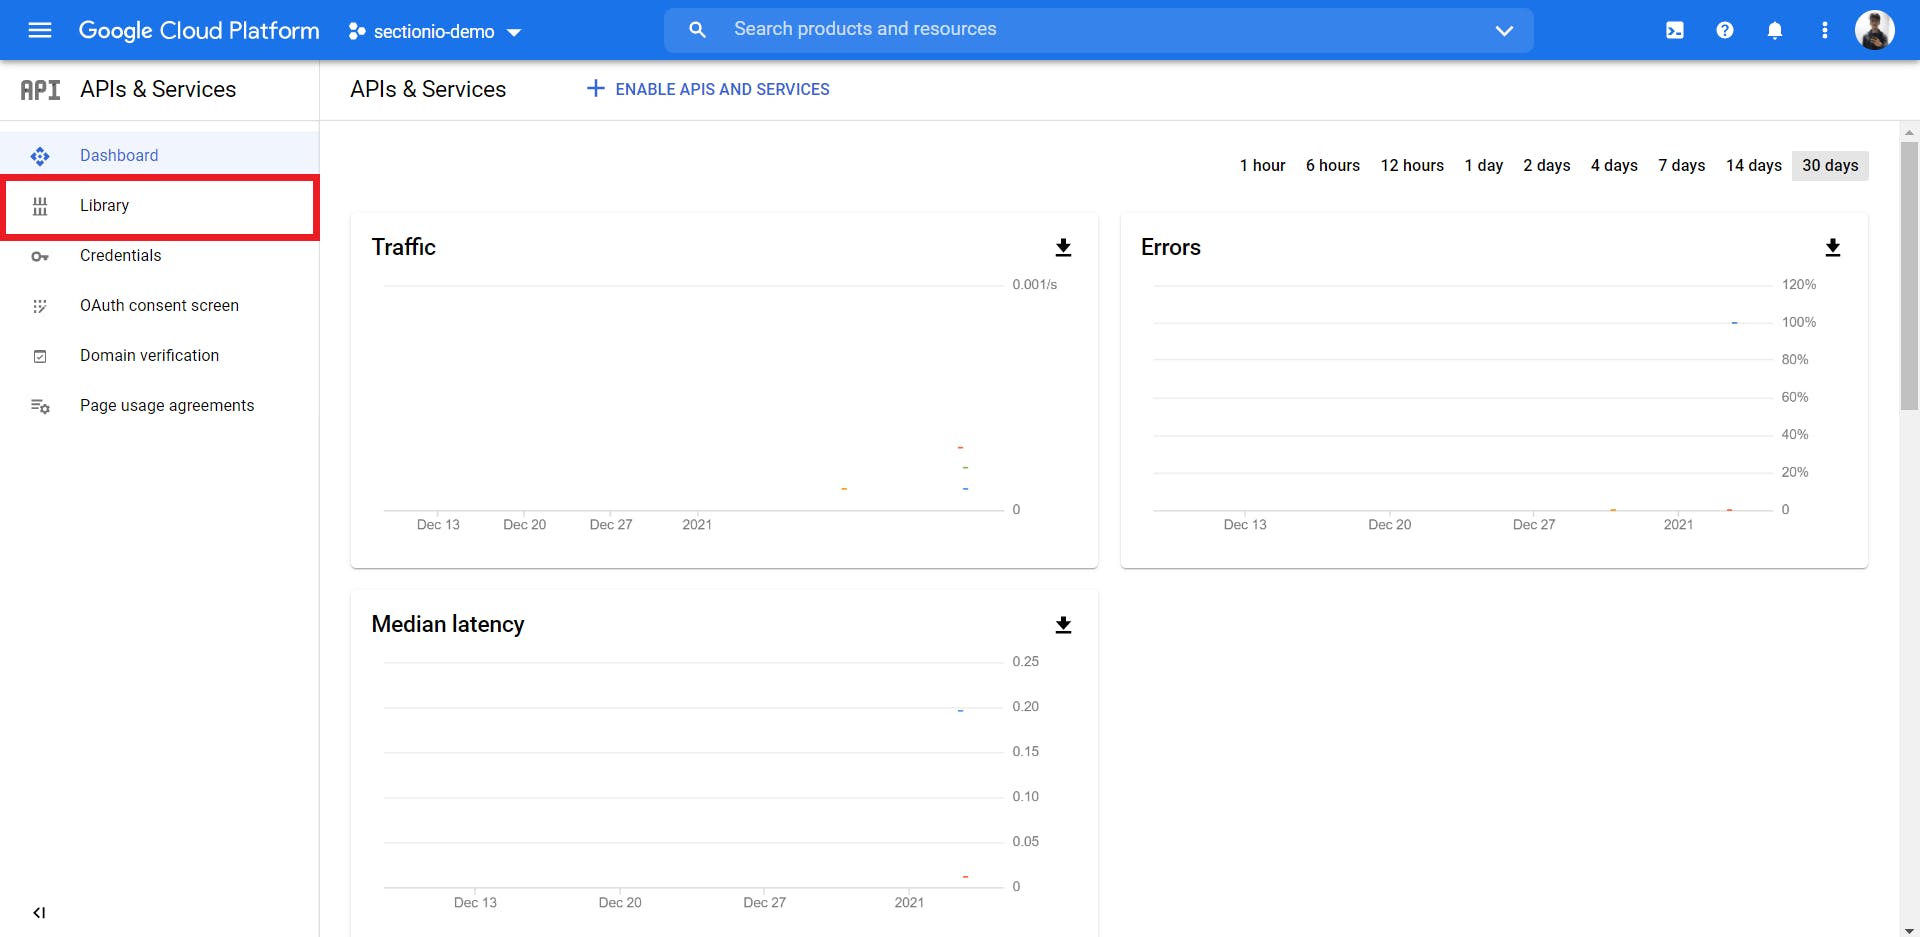
Head to Google Cloud Console and select the Google project that you are working on. Go to the API & Services tab.
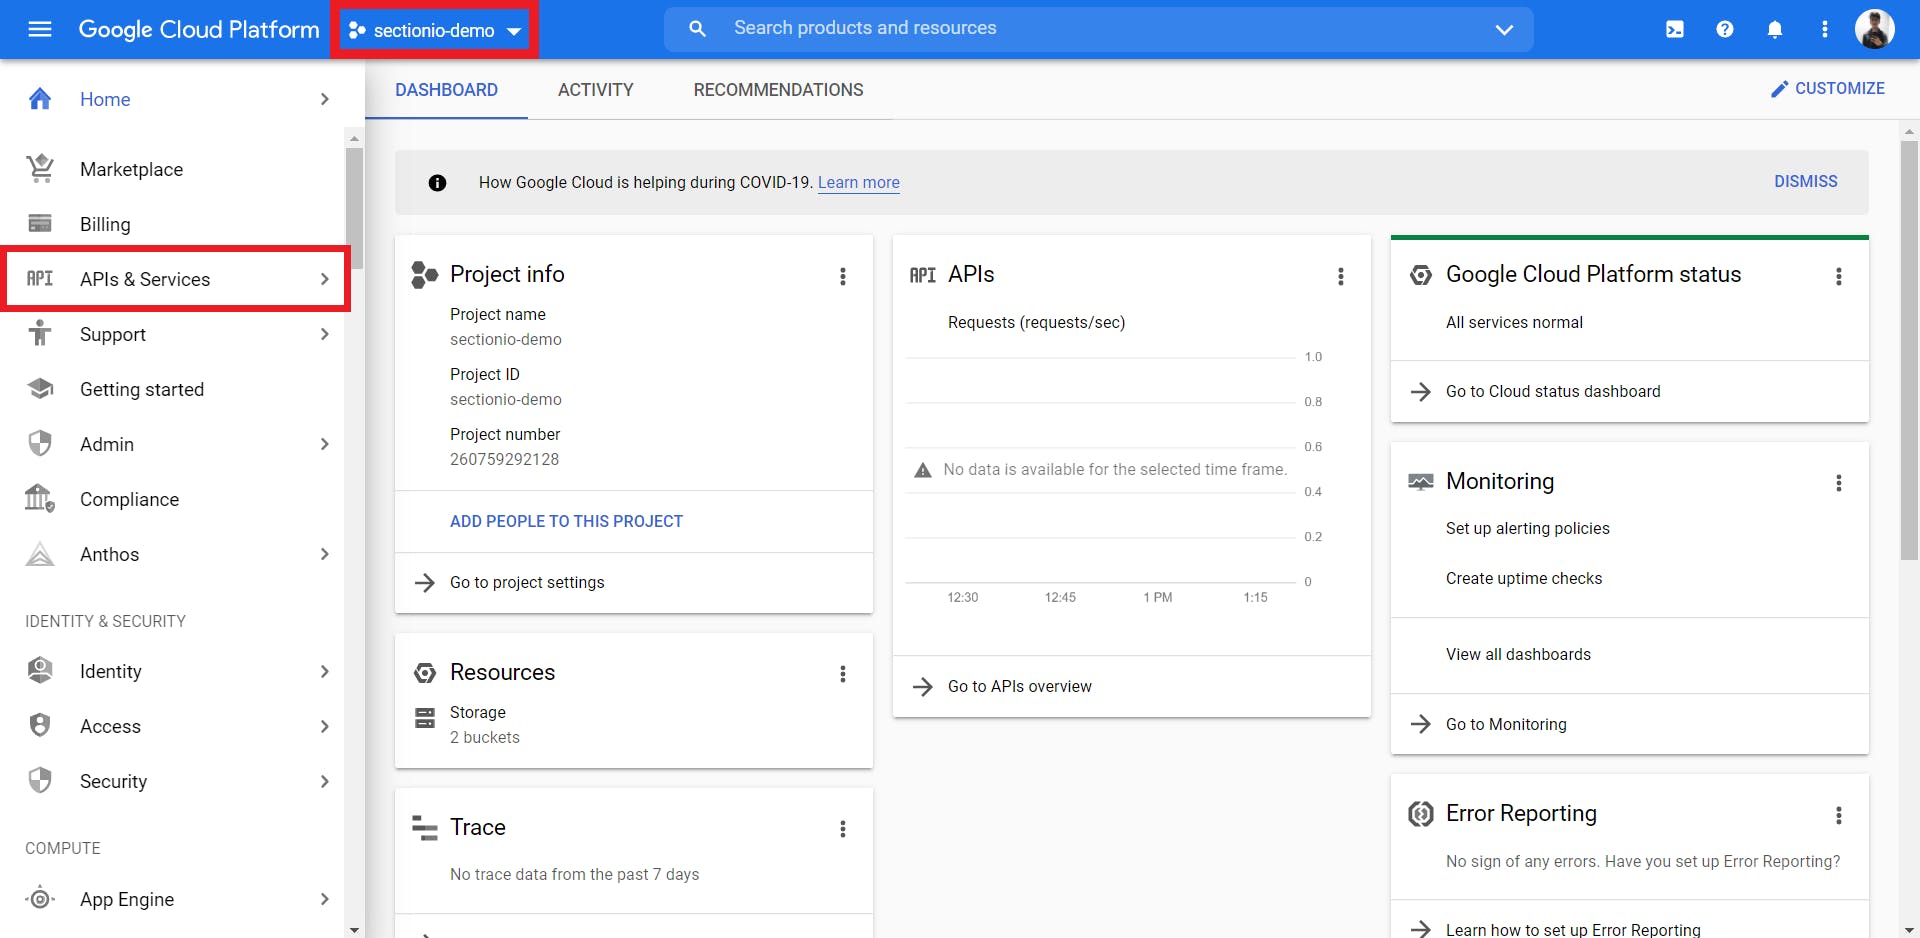
In the API & Service tab, head to the Libraries section.
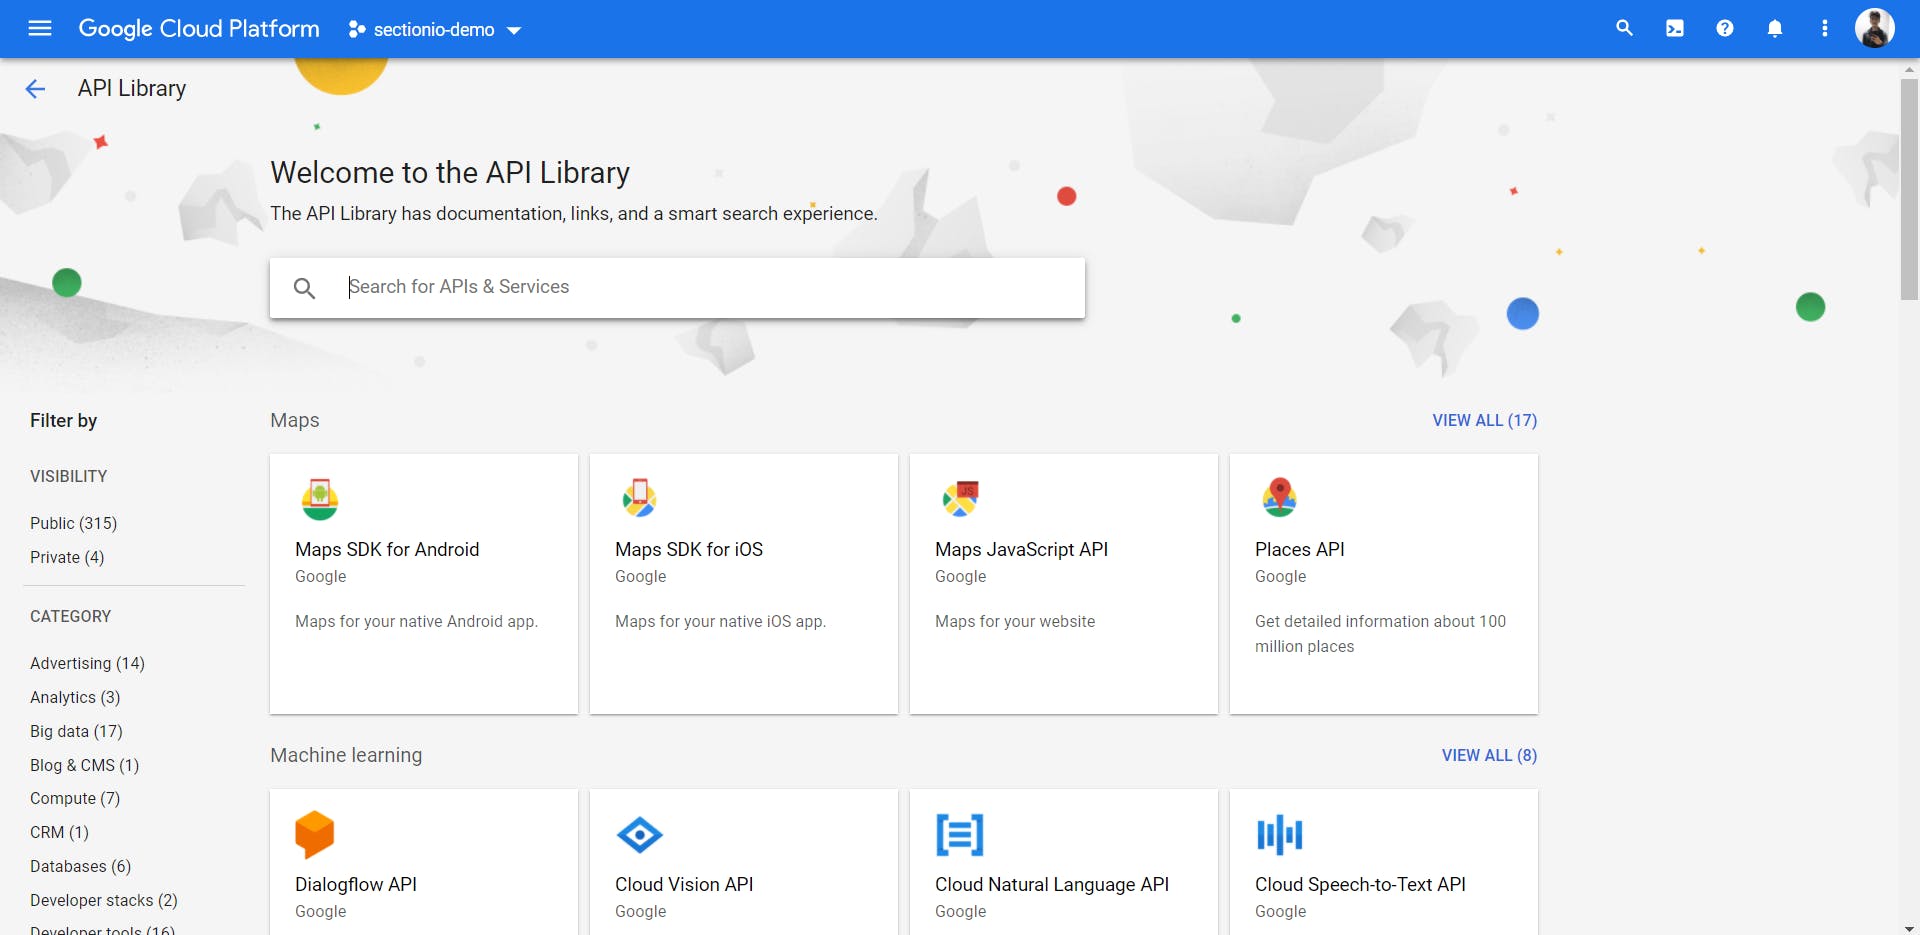
Search for Cloud Vision API.
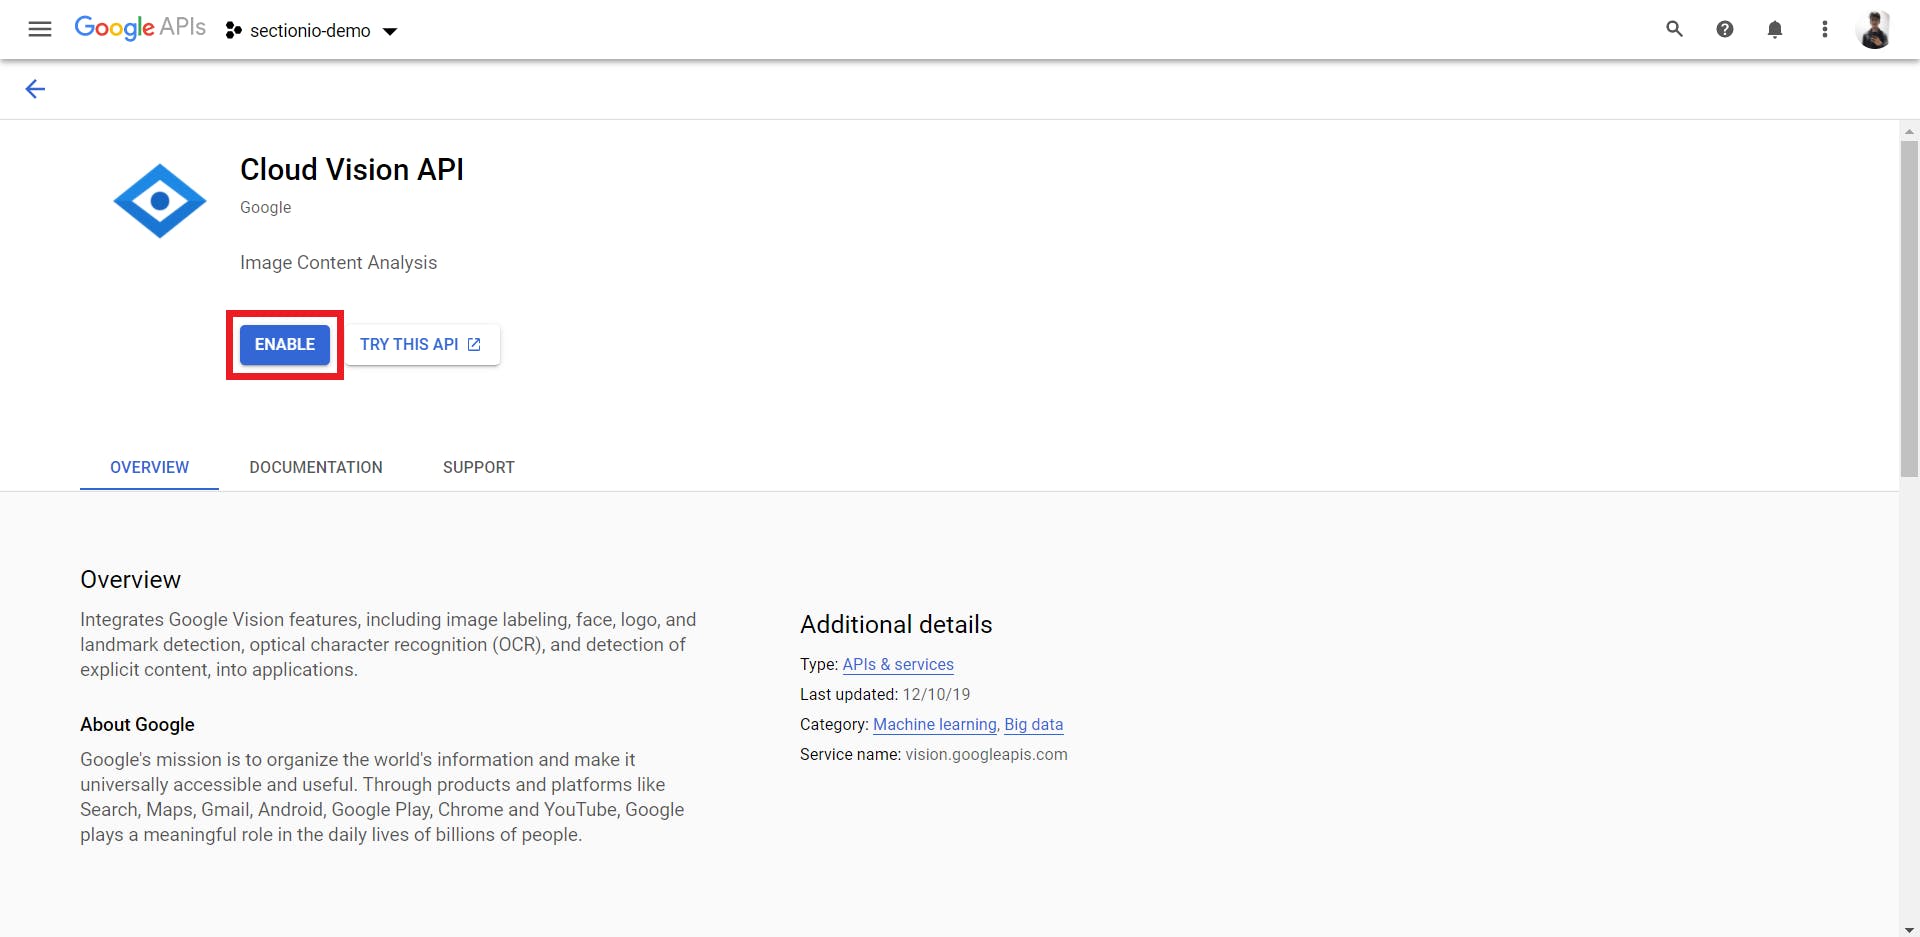
Once you open the API page, click on the Enable button.
Once you've enabled the API, you'll see the Cloud Vision API Overview page.
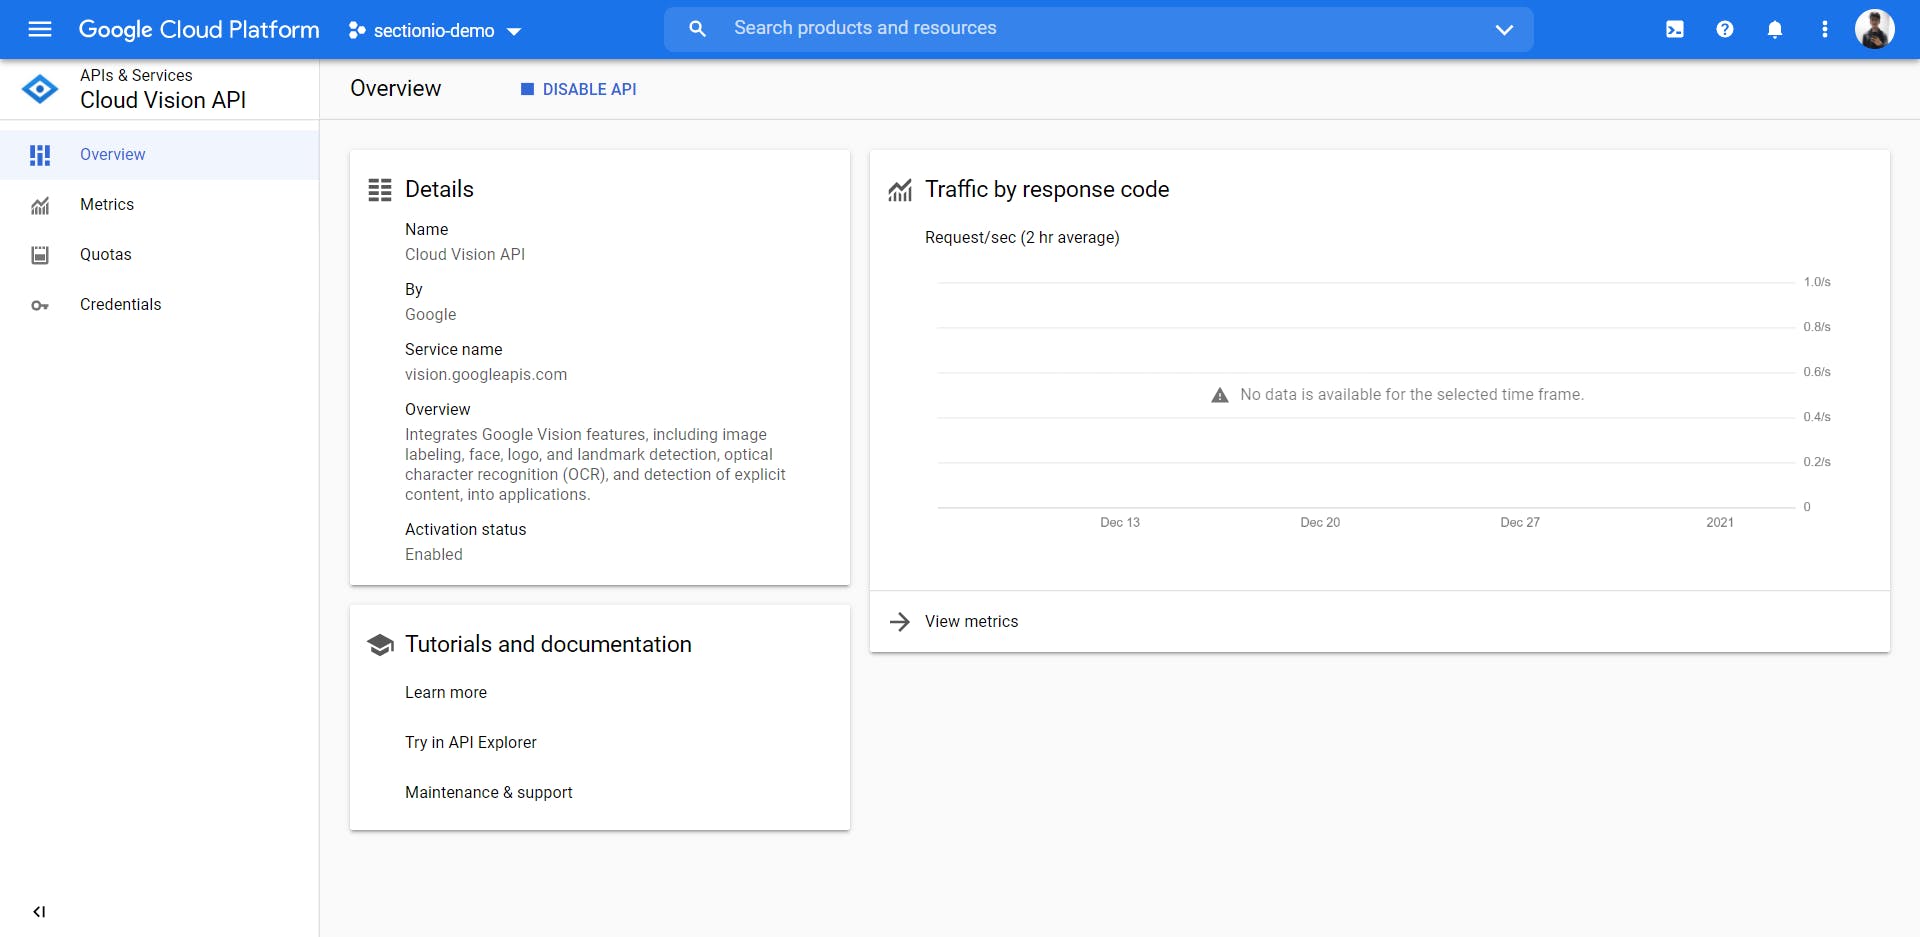
With this, you have set up the Cloud Vision API for your Firebase project. This will enable us to use the ML Kit to recognize text from images.
Building the UI
We'll be writing all of our code in the App.js file.
Let's add 2 buttons to the screen to take a photo and pick a photo.
import { StyleSheet, Text, ScrollView, View, TouchableOpacity } from 'react-native';

export default function App() {
  return (
    <ScrollView contentContainerStyle={styles.screen}>
      <Text style={styles.title}>Text Recognition</Text>
      <View>
        <TouchableOpacity style={styles.button}>
          <Text style={styles.buttonText}>Take Photo</Text>
        </TouchableOpacity>
        <TouchableOpacity style={styles.button}>
          <Text style={styles.buttonText}>Pick a Photo</Text>
        </TouchableOpacity>
      </View>
    </ScrollView>
  );
}
Styles:
const styles = StyleSheet.create({
  screen: {
    flex: 1,
    alignItems: 'center',
  },
  title: {
    fontSize: 35,
    marginVertical: 40,
  },
  button: {
    backgroundColor: '#47477b',
    color: '#fff',
    justifyContent: 'center',
    alignItems: 'center',
    paddingVertical: 15,
    paddingHorizontal: 40,
    borderRadius: 50,
    marginTop: 20,
  },
  buttonText: {
    color: '#fff',
  },
});

Adding media picker
Let's install the react-native-image-picker to add these functionalities.
npm install react-native-image-picker
The minimum target SDK for the React Native Image Picker is 21. If your project targets an SDK below 21, bump up the minSDK target in
android/build.gradle.
After the package is installed, import the launchCamera and launchImageLibrary functions from the package.
import { launchCamera, launchImageLibrary } from 'react-native-image-picker';
Both functions accept 2 arguments. The first argument is options for the camera or the gallery, and the second argument is a callback function. This callback function is called when the user picks an image or cancels the operation.
Check out this API reference for more details about these functions.
Now let's add 2 functions, one for each button.
const onTakePhoto = () => launchCamera({ mediaType: 'image' }, onImageSelect);

const onSelectImagePress = () => launchImageLibrary({ mediaType: 'image' }, onImageSelect);
Let's create a function called onImageSelect. This is the callback function that we are passing to the launchCamera and the launchImageLibrary functions. We will get the details of the image that the user picked in this callback function.
We should start the text recognition only when the user did not cancel the media picker. If the user canceled the operation, the picker will send a didCancel property in the response object.
const onImageSelect = async (media) => {
  if (!media.didCancel) {
    // Text Recognition Process
  }
};
You can learn more about the response object that we get from the launchCamera and the launchImageLibrary functions here.
Now, pass these functions to the onPress prop of the TouchableOpacity for the respective buttons.
<View>
  <TouchableOpacity style={styles.button} onPress={onTakePhoto}>
    <Text style={styles.buttonText}>Take Photo</Text>
  </TouchableOpacity>
  <TouchableOpacity style={styles.button} onPress={onSelectImagePress}>
    <Text style={styles.buttonText}>Pick a Photo</Text>
  </TouchableOpacity>
<View>
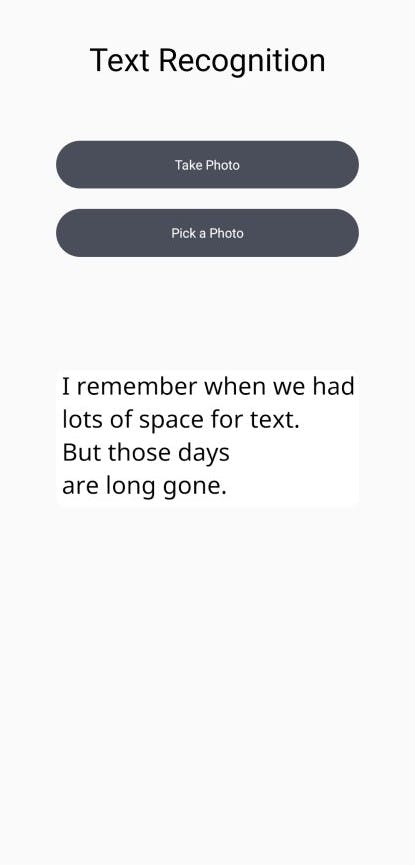
Let's create a state to display the selected image on the UI.
import { useState } from 'react';
const [image, setImage] = useState();
Now, let's add an image component below the buttons to display the selected image.
<View>
  <TouchableOpacity style={styles.button} onPress={onTakePhoto}>
    <Text style={styles.buttonText}>Take Photo</Text>
  </TouchableOpacity>
  <TouchableOpacity style={styles.button} onPress={onSelectImagePress}>
    <Text style={styles.buttonText}>Pick a Photo</Text>
  </TouchableOpacity>
  <Image source={{uri: image}} style={styles.image} resizeMode="contain" />
</View>
Styles for the image:
image: {
  height: 300,
  width: 300,
  marginTop: 30,
  borderRadius: 10,
},
If the user did not cancel the operation, let's set the image state with the URI of the selected image in the onImageSelect function.
const onImageSelect = async (media) => {
  if (!media.didCancel) {
    setImage(media.uri);
  }
};
Recognize the text from the image
Let's install the package for Firebase ML.
npm install @react-native-firebase/ml
Once the package is installed, let's import the package.
import ml from '@react-native-firebase/ml';
We should use the cloudDocumentTextRecognizerProcessImage method in the ml package to process the image and recognize text from it.
We will pass the URI of the selected image to this function.
const processingResult = await ml().cloudDocumentTextRecognizerProcessImage(media.uri);
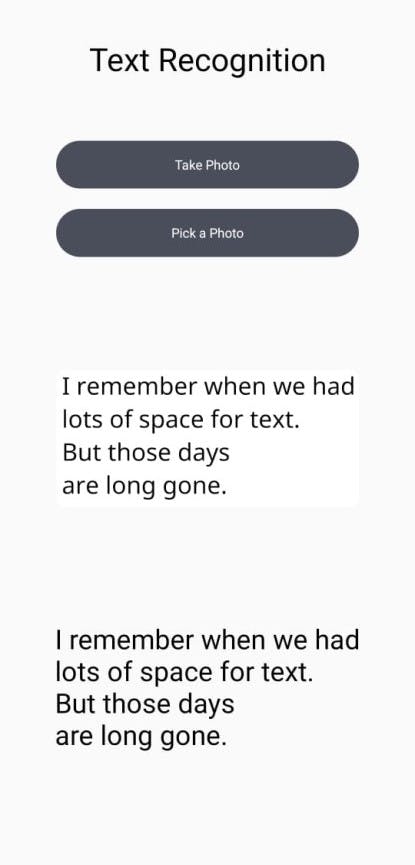
The function will process the image and return the text recognized in the image along with an array of blocks of recognized text.
Each block will contain details about:
The bounding rectangle of the detected block of text in the image.
The confidence the machine learning service has in the result.
A list of recognized languages in that block.
An array of paragaraphs recognized in the block of text.
To learn more about the result object, refer to the documentation.
Let's set up a state to store the result and render it in the UI.
const [result, setResult] = useState({});
Let's set the state to the response of the cloudDocumentTextRecognizerProcessImage function.
const onImageSelect = async (media) => {
  if (!media.didCancel) {
    setImage(media.uri);
    const processingResult = await ml().cloudDocumentTextRecognizerProcessImage(media.uri);
    console.log(processingResult);
    setResult(processingResult);
  }
};
We'll use this state to render the recognized text in the UI.
<View style={{marginTop: 30}}>
  <Text style={{fontSize: 30}}>{result.text}</Text>
</View>
Additional configurations
The cloudDocumentTextRecognizerProcessImage method accepts an optional configuration object.
languageHints: In most cases, not setting this yields the best results since it enables automatic language detection. For languages based on the Latin alphabet, setting language hints is not needed. In rare cases, when the language of the text in the image is known, setting a hint will help get better results (although it will be a significant hindrance if the hint is wrong).
apiKeyOverride: API key to use for the ML API. If not set, the default API key from
firebase.app()will be used.enforceCertFingerprintMatch: Only allow registered application instances with a matching certificate fingerprints to use ML API.
Example:
await ml().cloudDocumentTextRecognizerProcessImage(imagePath, {
  languageHints: ["en"], // string[]
  apiKeyOverride: "<-- API KEY -->",  // undefined | string,
  enforceCertFingerprintMatch: true, // undefined | false | true,
});
Let's Recap
We set up our development environment and created a React Native app.
We created a Firebase project.
We set up the Cloud Vision API to use the image text recognizer in the Firebase ML Kit.
We built a simple UI for the app with 2 buttons.
We added the
react-native-image-pickerpackage to pick images using the gallery or capture images using the camera.We installed the Firebase ML package.
We used the
cloudDocumentTextRecognizerProcessImagemethod in themlpackage to recognize the text from the image.We displayed the result in the UI.
We learned about the additional configurations that we can pass to the
cloudDocumentTextRecognizerProcessImagefunction.
Congratulations, :partying_face: You did it.
Happy Coding!
I do all my writing in my spare time, so if you feel inclined, a tip is always incredibly appreciated.
