


In this tutorial, we will be building a Livestreaming app with real-time engagement using React Native and Agora.
Goals
By the end of this tutorial, you’ll know:
How to create/join a livestream using Agora.
How to share a channel ID for others to join the livestream.
How to add event listeners on the livestream to listen to state changes.
Prerequisites
The fundamentals of React and React Native will not be covered in this tutorial. If you are not comfortable with the fundamentals, this is a helpful tutorial that you can go through before beginning with this project.
Agora
Founded in 2014, Agora.io is a service provider for real-time voice and video. Its core technology is real-time communication (RTC). Agora provides SDKs to build apps that require real-time engagement like:
Audio/Video Calls
Interactive Livestreaming (Audio/ Video)
Interactive Gaming
Real-Time Messaging (which is in BETA at the time of writing this article)
Agora supports up to 1 million users in a live broadcast channel. They also recommend limiting the number of users sending streams concurrently to 17 at most. You can learn more about Agora's capacity here.
Agora is a paid service, but the first 10,000 minutes are free every month. You can check their pricing here.
If you'd like to learn more about Agora, visit their website or read this article.
Overview
We'll be going through these steps in this article:
- Creating an Agora account
- Development environment
- Clone the starter code
- Installing dependencies
- Pass channel ID while navigating
- Setting up the live screen
- Extra features
- Recap
If you want to take a look at the final code, check out the GitHub Repo. I've made a commit for every step in this tutorial.
Creating an Agora account
Head to Agora and create an account. You can reach the signup page from here.
Fill in the details and create an account or you can signup with Google, GitHub, or Cocos. Once you've signed up, you'll see the dashboard.
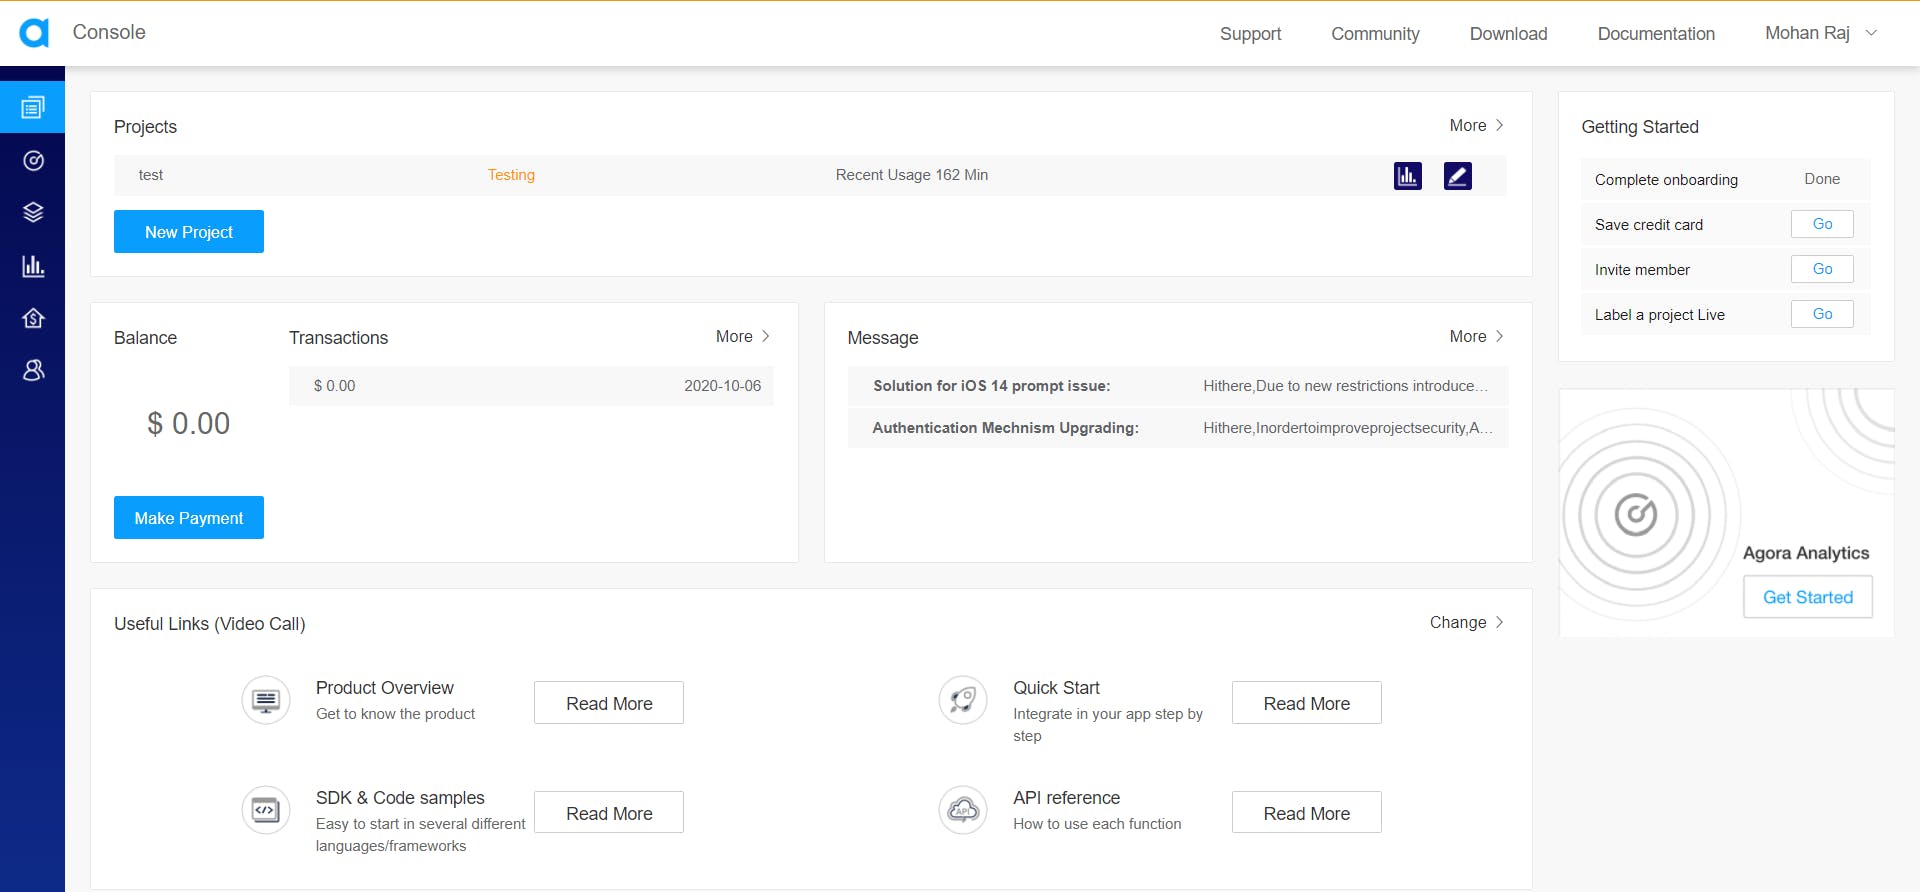
Click on New Project.
You'll see this form. Fill out the Project Name and set the Authentication Mechanism to Testing.

Once you hit on submit, it'll create a new project and you should see it on the Project Management Console.
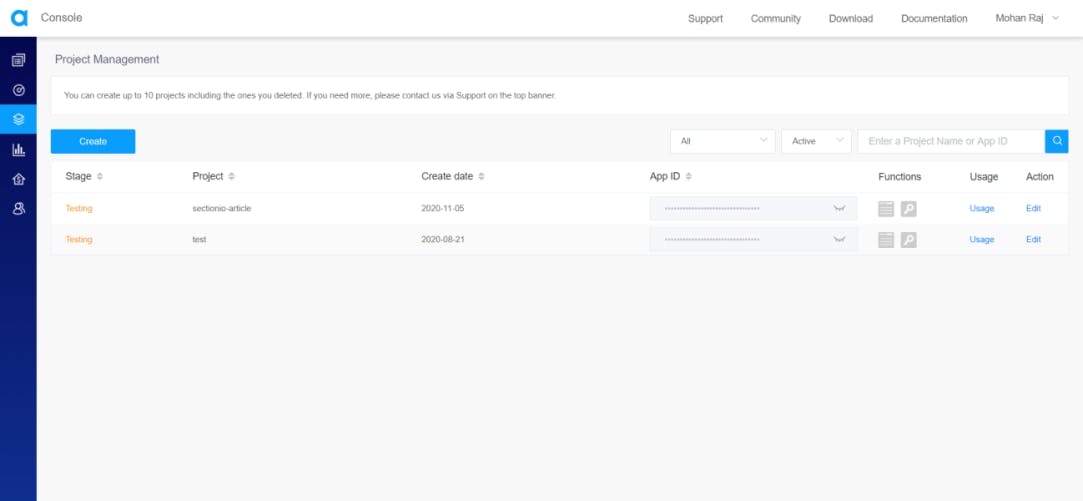
Now, click on the closed eye icon near the App ID to reveal it and copy that App ID. We'll need this later while setting up Agora in our app.
Development environment
IMPORTANT - We will not be using Expo in our project. Agora's React Native SDK does NOT work with expo managed workflow. This is because video calling SDKs need native modules that are not supported by Expo.
You can follow this documentation to set up the environment.
Make sure you're following the React Native CLI Quickstart, not the Expo CLI Quickstart.
Clone the starter code
To focus more on the Livestream, I've prepared a starter code. You can clone it from this repository on GitHub. Follow the Repository's README for instructions.
In the starter code, the Navigation is set up using a Stack Navigator with the Home screen and a dummy Live Screen. You can find the documentation for the React Native Navigation here.
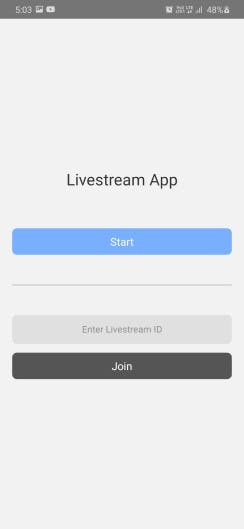
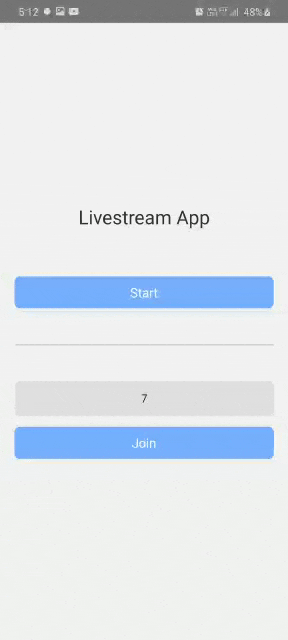
The Home Screen has 2 buttons, Start and Join. The Join button has a text input associated with it to provide the channel ID to join the stream. When the text input is empty, the join button will be disabled.
This is the Home Screen you'll see when you open the app.
Installing dependencies
You can install these in advance or while going through the article.
"react": "16.13.1",
"react-native": "0.63.3",
"react-native-agora": "^3.1.3",
"uuid": "^8.3.1"
"react-native-get-random-values": "^1.5.0",
"@react-navigation/native": "^5.8.6",
"@react-navigation/stack": "^5.12.3",
"react-native-screens": "^2.13.0",
"react-native-reanimated": "^1.13.1",
"react-native-gesture-handler": "^1.8.0",
"react-native-safe-area-context": "^3.1.8",
"@react-native-community/masked-view": "^0.1.10",
To install a dependency, run:
npm i --save <package-name>
After installing the packages, for iOS, go into your ios/ directory, and run:
pod install
IMPORTANT FOR ANDROID
As you add more native dependencies to your project, it may bump you over the 64k method limit on the Android build system. Once you reach this limit, you will start to see the following error while attempting to build your Android application.
Execution failed for task ':app:mergeDexDebug'.Use this documentation to enable multidexing. To learn more about multidex, view the official Android documentation.
Pass channel ID while navigating
When we create or join a livestream, we need to give a channel ID to Agora.
For a new livestream, we'll generate a new channel ID. To join a livestream, we'll use the channel ID from the text input.
We need to pass the channel ID from the Home Screen to the Live Screen. We can pass it as a route prop to the Live Screen.
You can learn more about route props here.
Let's install the UUID package to generate a channel ID.
npm install uuid
In React Native, you will run into an error with the message crypto.getRandomValues() is not supported when you use uuid.
To fix this, you will need to install react-native-get-random-values.
Let's install the react-native-get-random-values package to fix the issue.
npm install react-native-get-random-values
After installing the packages, for iOS, go into your ios/ directory, and run:
pod install
In screens/Home.js, import both of those packages.
We must import the
react-native-get-random-valuesbefore theuuidimport to avoid the error.
import "react-native-get-random-values";
import { v4 as uuid } from "uuid";
In the createLive function, we'll generate a new UUID and pass it as a route prop for the Channel ID.
In the joinLive function, we'll pass the text input's value for the Channel ID.
const createLive = () => navigation.navigate("Live", { type: "create", channel: uuid() });

const joinLive = () => navigation.navigate("Live", { type: "join", channel: joinChannel });
Notice that we are also passing a route prop called type along with the channel. We'll be using this to determine whether the user is a broadcaster or an audience user on the Livestream page.
When you press these buttons, it should be the same as before. But, we can access the channel route prop in the Live Screen.
You can learn more about the useNavigation hook which is present in the starter code here.
Setting up the live screen
To use Agora, we need to install react-native-agora.
Let's install it using the commands below.
npm install react-native-agora
After installing the package, for iOS, go into your ios/ directory, and run:
pod install
Documentation for React Native Agora
Creating the Agora engine instance
Let's open the screens/Live.js.
In here, we need to import the RtcEngine from react-native-agora.
import RtcEngine from "react-native-agora";
RtcEngine has a function called create on it, that will create an Agora engine. We need to call that function when the component mounts. It'll return the Agora engine instance.
We can't create a normal variable in the function's scope and assign the engine's instance to it. This is because we'll lose the instance on a component re-render. So, we'll create a ref using useRef and assign the engine instance to it.
We need to create this engine instance when the component mounts. We'll use the useEffect hook to execute this on the component mount.
The useEffect hook accepts a function that will be executed on any state update. It also accepts an array of state elements, to limit the call of this function, only to the state changes of those elements. When we pass an empty array, the function will only be called when the component mounts.
Inside the function body, you can return a cleanup function that will get executed when the component unmounts.
useEffect(() => {
  // Function Body

  return () => {
    // Cleanup Function
  }
}, [ /* State Elements */ ])
To learn more about the useRef and the useEffect hooks, refer here.
So let's import useEffect and useRef from React.
import React, { useEffect, useRef } from "react";
RtcEngine.create('Your App ID Here') takes one argument, that is the App ID that we copied from the Agora Project Management Console.
It's an async function, and when we call it, it'll return an RTC engine instance. We'll assign the engine instance to a ref created using useRef.
You can't pass an async function to an useEffect. So, let's create an async function called init and then call it in the function body of useEffect.
export default function Live(props) {
  const AgoraEngine = useRef();

  const init = async () => {
    AgoraEngine.current = await RtcEngine.create("Your App ID Here");
  };

  useEffect(() => {
    init();
  }, []);

  // Rest of the Code
}
We need to destroy the Agora engine instance when the component unmounts. If you forget to do this, the App may still be transmitting and receiving video and audio in the background.
useEffect(() => {
  init();
  return () => {
    AgoraEngine.current.destroy();
  };
}, []);
Enable video transmission
Next, we need to enable video in the engine to send and receive video. The Agora engine instance has a method called enableVideo on it. But before we call that method, we need to get permissions from Android to access the camera and microphone.
This step is only for
android, not foriOS.
Let's write a function to get these permissions. We can use the PermissionsAndroid component provided by React Native to get these permissions.
To learn more about PermissionsAndroid, refer here.
import { PermissionsAndroid } from "react-native";

async function requestCameraAndAudioPermission() {
  try {
    const granted = await PermissionsAndroid.requestMultiple([
      PermissionsAndroid.PERMISSIONS.CAMERA,
      PermissionsAndroid.PERMISSIONS.RECORD_AUDIO,
    ]);
    if (
      granted["android.permission.RECORD_AUDIO"] === PermissionsAndroid.RESULTS.GRANTED &&
      granted["android.permission.CAMERA"] === PermissionsAndroid.RESULTS.GRANTED
    ) {
      console.log("You can use the cameras & mic");
    } else {
      console.log("Permission denied");
    }
  } catch (err) {
    console.warn(err);
  }
}
Now, we need to call this in our useEffect before init.
import { Platform } from 'react-native';

useEffect(() => {
  if (Platform.OS === 'android') await requestCameraAndAudioPermission();
  init();
  return () => {
    AgoraEngine.current.destroy();
  }
}, []);
Once we have acquired the permissions, we can enable video in the Agora engine. The Agora engine enables audio by default.
const init = async () => {
  AgoraEngine.current = await RtcEngine.create("Your App ID Here");
  AgoraEngine.current.enableVideo();
};
Configure the Agora engine
Next, we need to set the Channel Profile to Livestreaming. react-native-agora provides enums for Channel Profiles.
Let's import it and set the Channel Profile to Live Broadcasting. To learn more about ChannelProfile, refer here.
import { ChannelProfile } from "react-native-agora";

const init = async () => {
  AgoraEngine.current = await RtcEngine.create("Your App ID Here");
  AgoraEngine.current.enableVideo();
  AgoraEngine.current.setChannelProfile(ChannelProfile.LiveBroadcasting);
};
Next, we need to set the current user's profile. The default profile is set to Audience. So, we need to set the Client Profile to Broadcaster if the user pressed Create on the Homescreen.
We can identify this by the type route prop that we pass when navigating to this screen. You can access the route prop like props.route.params.propname. In our case, it'll be props.route.params.type.
Let's import the enum ClientRole provided by react-native-agora. To Learn more about ClientRole, refer here.
Remember, we don't need to set the Client Role if the user is the audience. It's the default value.
import { ClientRole } from "react-native-agora";

const isBroadcaster = props.route.params.type === "create";

const init = async () => {
  AgoraEngine.current = await RtcEngine.create("App ID");
  AgoraEngine.current.enableVideo();
  AgoraEngine.current.setChannelProfile(ChannelProfile.LiveBroadcasting);
  if (isBroadcaster) AgoraEngine.current.setClientRole(ClientRole.Broadcaster);
};
Joining the Agora channel
Now that we have set all the config required for the Livestream, we need to join the channel.
Since init is an async function, we can add a .then() to it and join the channel inside it.
To join the channel, the Agora engine instance has a joinChannel function on it. It takes 4 arguments, Authentication Token, Channel ID, Optional Info, and Optional UID. To learn more about joinChannel, refer here.
Let's not worry about Authentication and Optional info now. We'll pass null for authentication and optional info. You can learn more about Authentication here.
For the Channel ID, we'll pass what we get from the route props.
For the Optional UID, we'll pass 1 if the user is a Broadcaster or 0 if the user is an audience.
This is because we'll use the UID of the Broadcaster to listen to state changes and establish the remote feed on the audience's side.
If the Optional UID is set to 0, the SDK assigns a UID and returns it in the JoinChannelSuccess callback.
useEffect(() => {
  const uid = isBroadcaster ? 1 : 0;
  init().then(() => AgoraEngine.current.joinChannel(null, props.route.params.channel, null, uid));
  return () => {
    AgoraEngine.current.destroy();
  };
}, []);
To ensure we have joined the channel, we can add a JoinChannelSuccess listener to the engine. Let's add that in the init function.
const init = async () => {
  AgoraEngine.current = await RtcEngine.create("You App ID Here");
  AgoraEngine.current.enableVideo();
  AgoraEngine.current.setChannelProfile(ChannelProfile.LiveBroadcasting);
  if (isBroadcaster) AgoraEngine.current.setClientRole(ClientRole.Broadcaster);

  AgoraEngine.current.addListener("JoinChannelSuccess", (channel, uid, elapsed) =>
    console.log("JoinChannelSuccess", channel, uid, elapsed)
  );
};
Now, when we navigate to the Live screen page, we will see the console.log message from the JoinChannelSuccess callback.
This means we have joined the livestream. But we can't see the livestream feed yet. The next step is to display the Remote Feed of the Host to the Audience and the Local Feed to the Broadcaster.
Displaying the feed
Let's import RtcLocalView and RtcRemoteView form react-native-agora.
On the Broadcaster's side, we'll use RtcLocalView to display the feed of the Local Camera.
On the audience's side, we'll use RtcRemoteView to display the stream from the Broadcaster.
import { RtcLocalView, RtcRemoteView } from "react-native-agora";
We shouldn't be showing these until the user joins the channel. So, let's create a state for that and set the initial value to false.
const [joined, setJoined] = useState(false);
Now, we can use the JoinChannelSuccess listener to update the state.
AgoraEngine.current.addListener("JoinChannelSuccess", (channel, uid, elapsed) => {
  console.log("JoinChannelSuccess", channel, uid, elapsed);
  setJoined(true);
});
We can use this state to display a loading screen.
import { ActivityIndicator } from "react-native";
If the user has not joined, we'll return the Loading Screen.
return (
  <View style={styles.container}>
    {!joined ? (
      <>
        <ActivityIndicator
          size={60}
          color="#222"
          style={styles.activityIndicator}
        />
        <Text style={styles.loadingText}>Joining Stream, Please Wait</Text>
      </>
    ) : (
      {/ *Live Feed */}
    )}
  </View>
);
Styles for the loading screen:
loadingText: {
  fontSize: 18,
  color: '#222',
},
When the joined state is set to true, we need to show the livestream.
The RtcLocalView requires only one prop, that is the channelId prop. The rest are optional.
The RtcRemoteView requires 2 props. One is the channelId and the other is the uid prop.
The uid prop decides which user's stream in the channel is to be displayed on this view.
We can also pass styles to the RtcLocalView and RtcRemoteView.
Here, we will pass our host's UID, which is 1.
Return Statement when joined === true:
<>
  {isBroadcaster ? (
    <RtcLocalView.SurfaceView
      style={styles.fullscreen}
      channelId={props.route.params.channel}
    />
  ) : (
    <RtcRemoteView.SurfaceView
      uid={1}
      style={styles.fullscreen}
      channelId={props.route.params.channel}
    />
  )}
</>
Styles for RtcLocalView and RtcRemoteView:
import { Dimensions } from "react-native";

const dimensions = {
  width: Dimensions.get("window").width,
  height: Dimensions.get("window").height,
};

const styles = StyleSheet.create({
  // Rest of the Styles

  fullscreen: {
    width: dimensions.width,
    height: dimensions.height,
  },
});
Extra features
Share the channel ID
Let's add a Share button to share the channel ID with others. We need to import the Share component from react-native.
import { Share } from "react-native";
The Share component has a method share on it, that accepts two arguments,content and options. We'll pass the channel ID in content like this:
{ message: props.route.params.channel }
You can learn more about the Share component here.
Let's write the function to call when we press the share button.
export default function Live(props) {
  const onShare = async () => {
    try {
      await Share.share({ message: props.route.params.channel });
    } catch (error) {
      console.log(error.message);
    }
  };

  // Rest of the Code
}
Let's add a button to the Live screen page.
<>
  {isBroadcaster ? (
    <RtcLocalView.SurfaceView
      style={styles.fullscreen}
      channelId={props.route.params.channel}
    />
  ) : (
    <RtcRemoteView.SurfaceView
      uid={1}
      style={styles.fullscreen}
      channelId={props.route.params.channel}
    />
  )}
  <View style={styles.buttonContainer}>
    <TouchableOpacity style={styles.button} onPress={onShare}>
      <Text style={styles.shareText}>Share</Text>
    </TouchableOpacity>
  </View>
</>
Share Button Styles:
buttonContainer: {
  flexDirection: 'row',
  position: 'absolute',
  bottom: 0,
},
button: {
  width: 150,
  backgroundColor: '#fff',
  marginBottom: 50,
  paddingVertical: 13,
  borderRadius: 8,
  alignItems: 'center',
  marginHorizontal: 10,
},
buttonText: {
  fontSize: 17,
},
Switch camera
Let's add another button in the Live screen to switch the camera when the user presses it.
The Agora engine has a method called switchCamera on it to toggle between the front camera and back camera.
Function to Switch camera:
const onSwitchCamera = () => AgoraEngine.current.switchCamera();
Switch Camera button:
<View style={styles.buttonContainer}>
  <TouchableOpacity style={styles.button} onPress={onShare}>
    <Text style={styles.buttonText}>Share</Text>
  </TouchableOpacity>
  <TouchableOpacity style={styles.button} onPress={onSwitchCamera}>
    <Text style={styles.buttonText}>Switch Camera</Text>
  </TouchableOpacity>
</View>
Broadcaster video status
Agora provides a listener called RemoteVideoStateChanged. This listens for any state changes in the video of all the users in the livestream.
When a video state changes, it provides the UID and the Video State of that user. To learn more about the RemoteVideoStateChanged listener, refer here.
Let's add a state for the broadcaster's video state and set the initial value to Decoding. The react-native-agora package provides an enum for all the remote video states.
import { VideoRemoteState } from "react-native-agora";
You can learn more about the VideoRemoteState enum here.
The broadcaster's video state:
const [broadcasterVideoState, setBroadcasterVideoState] = useState(VideoRemoteState.Decoding);
Let's add the RemoteVideoStateChanged listener in the init function.
We only need to listen for the host's video state, and we know the Host's UID (is 1).
AgoraEngine.current.addListener("RemoteVideoStateChanged", (uid, state) => {
  if (uid === 1) setBroadcasterVideoState(state);
});
Let's add a function to provide a text message for each state.
const videoStateMessage = (state) => {
  switch (state) {
    case VideoRemoteState.Stopped:
      return "Video turned off by Host";

    case VideoRemoteState.Frozen:
      return "Connection Issue, Please Wait";

    case VideoRemoteState.Failed:
      return "Network Error";
  }
};
We can display the remote feed or the state message based on the broadcaster's video state.
broadcasterVideoState === VideoRemoteState.Decoding ? (
  <RtcRemoteView.SurfaceView
   uid={1}
   style={styles.fullscreen}
   channelId={props.route.params.channel}
  />
) : (
  <View style={styles.broadcasterVideoStateMessage}>
    <Text style={styles.broadcasterVideoStateMessageText}>{videoStateMessage(broadcasterVideoState)}</Text>
  </View>
);
Styles for the Video State message:
broadcasterVideoStateMessage: {
  position: 'absolute',
  bottom: 0,
  width: '100%',
  height: '100%',
  backgroundColor: '#222',
  justifyContent: 'center',
  alignItems: 'center',
  flex: 1,
},
broadcasterVideoStateMessageText: {
  color: '#fff',
  fontSize: 20,
},
Let's Recap
We set up our Agora Account.
We created a project using the Project Management Dashboard and acquired the App ID.
We cloned the starter code.
We passed a UUID when we navigated to the Live screen which is the channel ID used for the Livestream.
We acquired Camera and Microphone permissions from Android to send Audio and Video.
We initiated the Agora Engine instance and setup all the necessary configurations.
We joined the channel using no authentication and the channel ID from the route prop.
We displayed the Local View and Remote View based on who is using the app, the broadcaster, or the audience.
We added a Share button to share the UUID with others from the Live screen.
We added a Switch Camera button to switch between the front camera and the back camera.
We added a Remote Video State Listener to listen to the broadcaster's video state.
Congratulations, :partying_face: You did it.
Happy Coding!
I do all my writing in my spare time, so if you feel inclined, a tip is always incredibly appreciated.
