


In this tutorial, we will be building a server using Node.js and Express to generate authentication tokens for the Agora SDKs. Authentication tokens are used in Agora SDKs to improve security. There are three authentication mechanisms available in Agora that we will discuss further below.
Goals
By the end of this tutorial, you’ll know:
How Agora's authentication works.
How to generate a temporary token for testing.
How to set up an Express server to dispatch authentication tokens for the Agora SDKs.
Agora
Agora.io was founded in 2014. It's a service provider for real-time voice and video. Its core technology is real-time communication (RTC).
Agora provides SDKs to build apps that require real-time engagement like:
Audio/Video Calls.
Interactive Livestreaming (Audio/ Video).
Interactive Gaming.
Real-Time Messaging (which is in BETA at the time of writing this article).
Agora is a paid service, but the first 10,000 minutes are free every month. You can check their pricing here.
If you'd like to learn more about Agora, visit their website or read this article.
Overview
We'll be going through these steps in this article:
- Authentication in Agora.
- Creating a project in Agora.
- Generating a temporary token.
- Setting up the server.
- Generating authentication tokens.
- Recap.
If you want to take a look at the final code, check out the GitHub Repo.
Prerequisites
This tutorial is for applications that use Agora and want to implement authentication for its users. If you are not using Agora in your application, then this tutorial is not for you.
If you'd like to learn how to build a Livestream application with React Native and Agora, you can refer to this tutorial.
The fundamentals of Node.js and Express will not be covered in this tutorial. If you are not comfortable with the fundamentals, this is a helpful tutorial that you can go through before beginning with this project.
Authentication in Agora
We can provide authentication tokens for the Agora SDKs to improve security. There are three authentication mechanisms available in Agora.
App ID: All clients in a channel use app ID for authentication. (Low Security)
Token: All clients in a channel use Token for authentication. (High Security)
App ID or Token: In a channel, some clients use an app ID for authentication, while others use a token. This is used in a transition scenario when you upgrade your project from App ID authentication to Token authentication.
It's recommended to upgrade all your projects to use tokens for authentication since Agora is phasing out the support for App ID authentication.
App ID mechanism
An App ID is the unique identity of the project. If your app ID gets compromised, others can use it in their projects. So, it's not recommended to use an app ID for authentication.
Token mechanism
A token is a dynamic key generated by using App ID, App Certificate, User ID, Channel name, Token expiration timestamp, and other information. It's recommended to use a token for authentication as it's more secure than App ID authentication.
Tokens are generated on your server. When a user joins a channel the client requests the server for a token. The server will generate a token and pass it back to the client as the response.
You can refer to the documentation for Agora's authentication here.
Creating a project in Agora
Head to Agora and create an account. You can reach the signup page from here.
Fill in the details and create an account or you can signup with Google, GitHub, or Cocos. Once you've signed up, you'll see the dashboard.
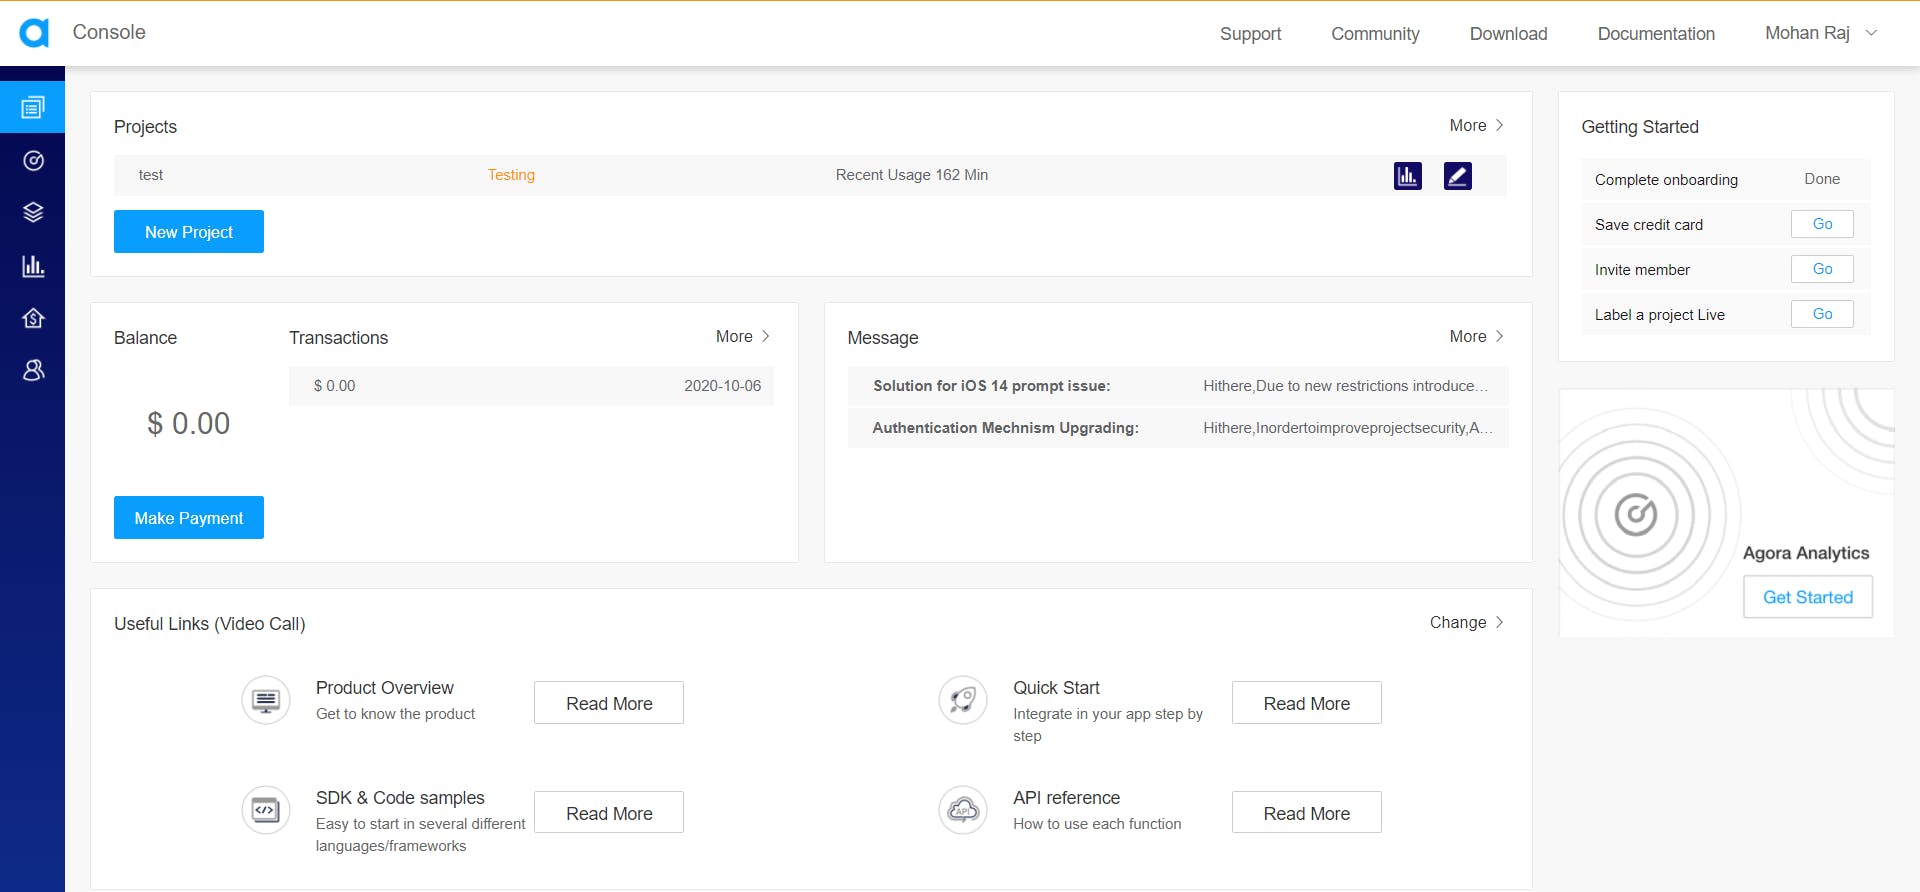
Click on New Project.
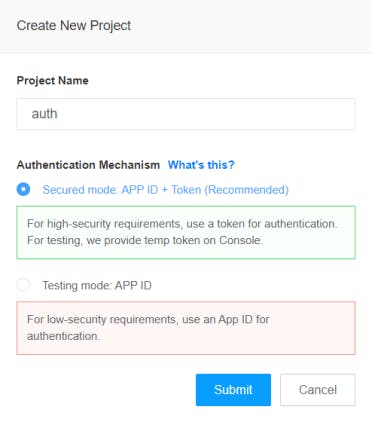
You'll see this form. Fill out the Project Name and set the Authentication Mechanism to Secure Mode.
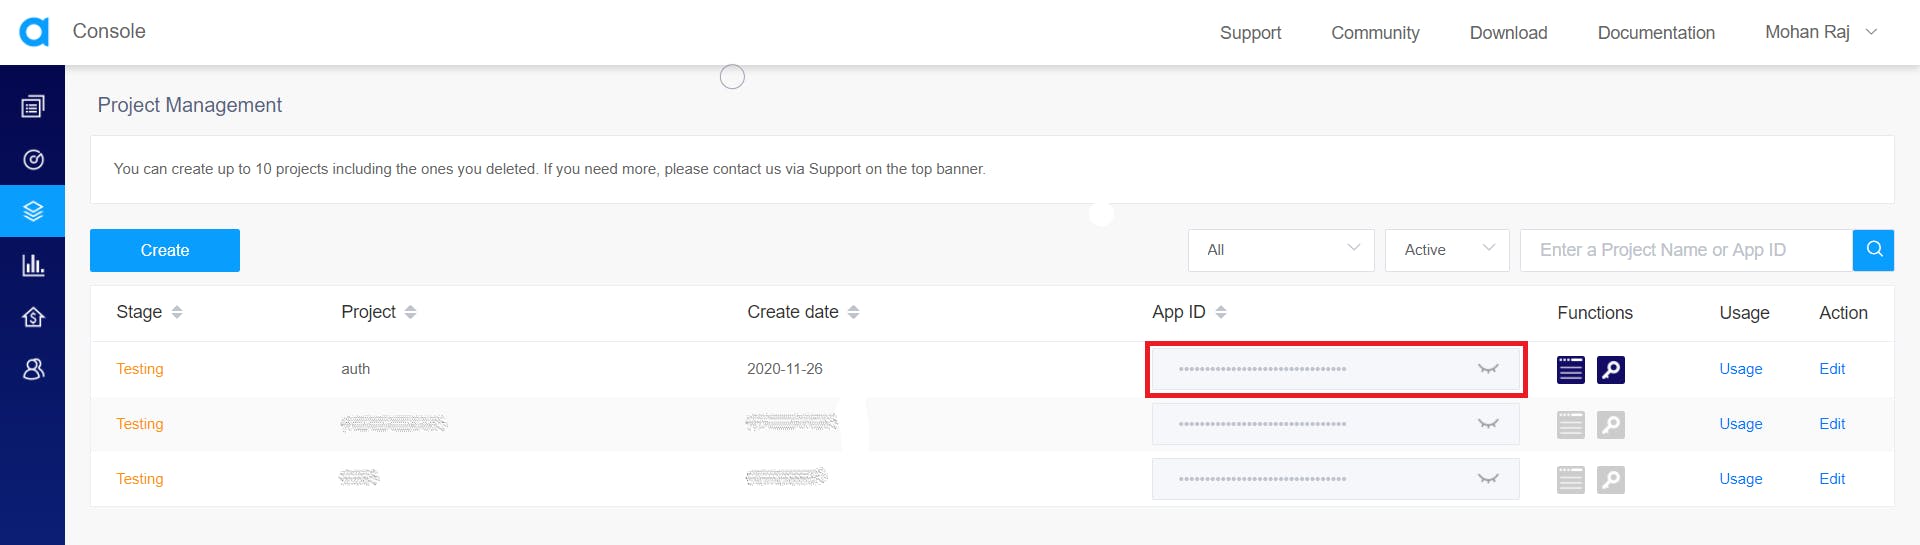
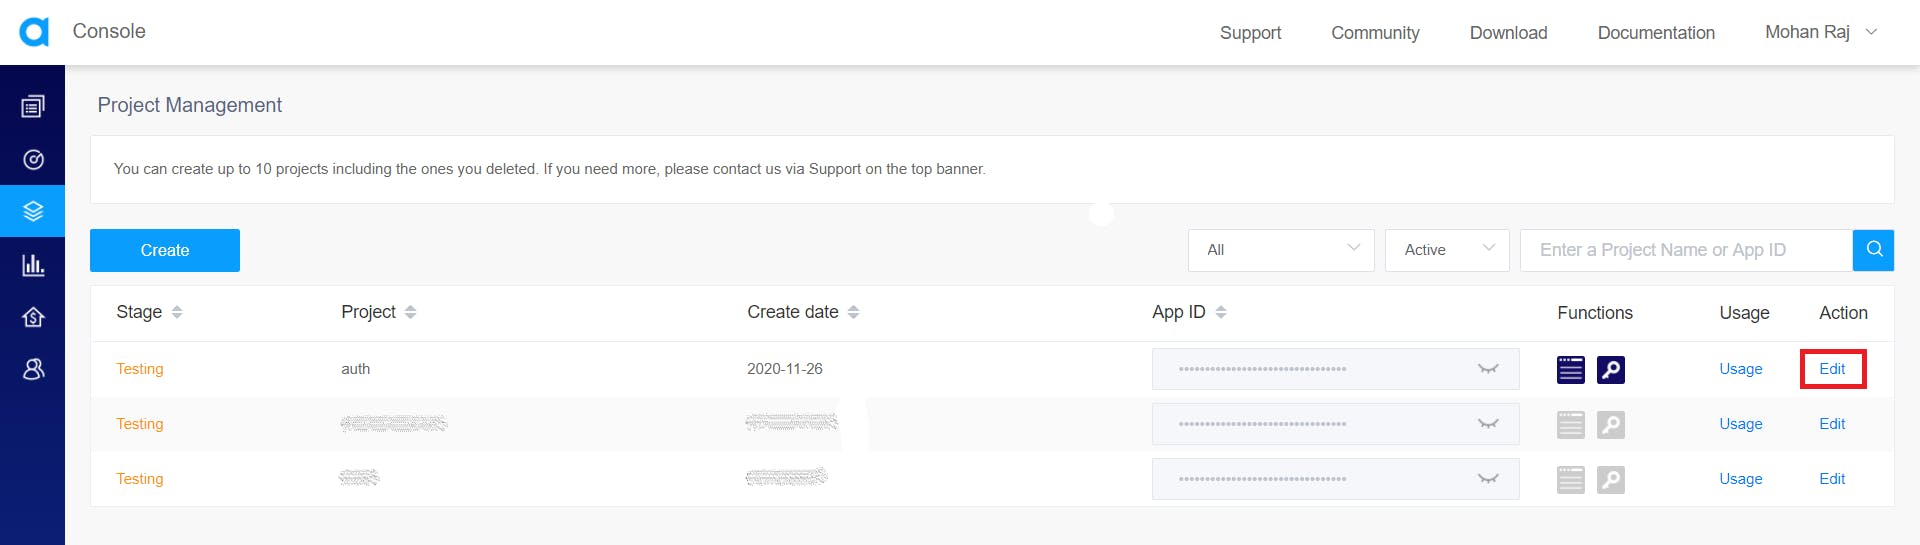
Once you hit on submit, it'll create a new project and you should see it on the Project Management Console.
Now, click on the closed eye icon near the app ID to reveal it and copy that app ID. We'll need this ID to generate the authentication tokens.
Now, click on the Edit action.
This will take you to the Edit Project screen. Here, you can copy the primary certificate that is required to generate the tokens.
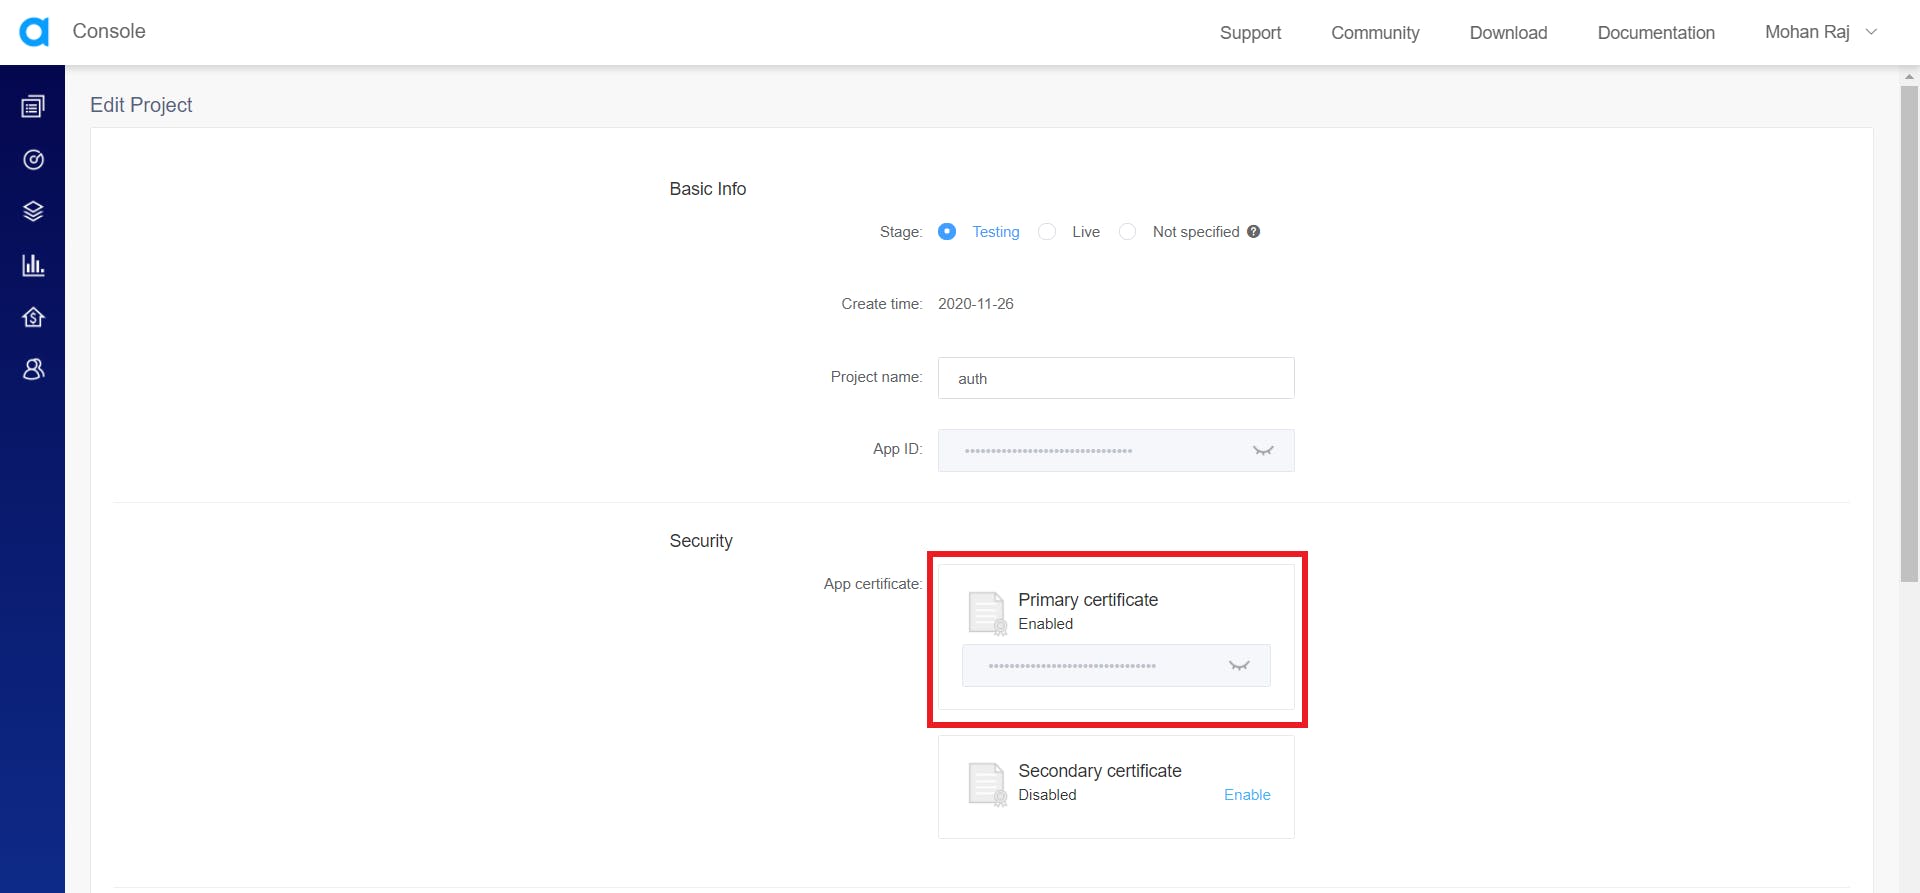
The app ID and the app certificates must be kept secret. If the primary certificate gets compromised, you can enable a secondary app certificate and replace the current certificate with the secondary certificate. Later, you can delete the compromised app certificate. Make sure you update the token server with the new app certificate.
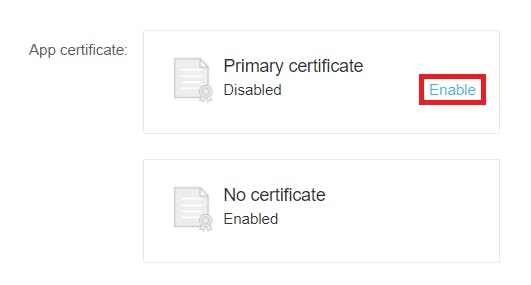
If you've set the Authentication Mode to Testing while creating the project, the primary certificate will be disabled. You can enable the primary certificate by clicking on Enable.
Generating a temporary token
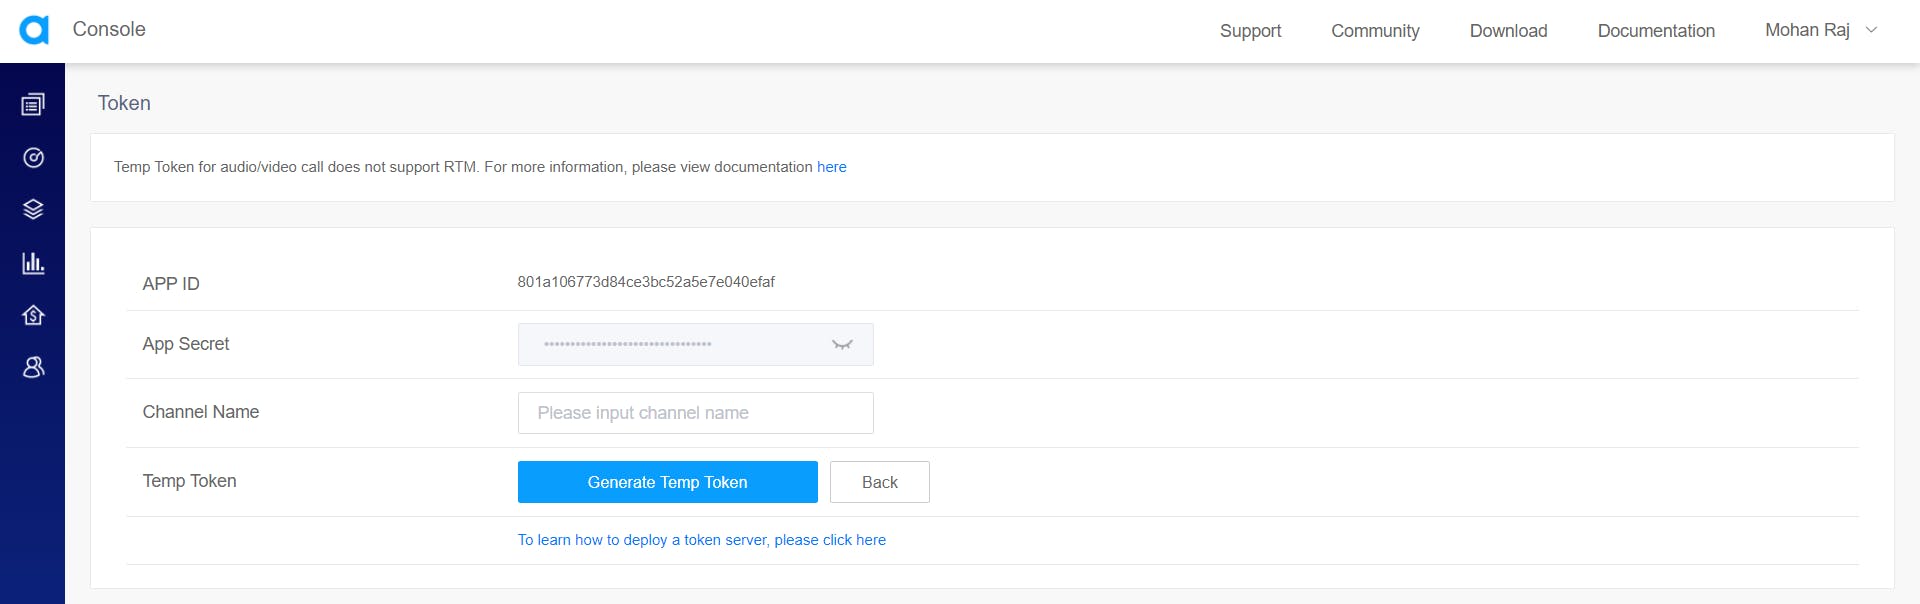
For testing purposes, you can generate a temporary token from the project management console. Click on the temporary token button next to the app ID in the project management console.

This will take you to generate a temporary token form. You need to fill in the channel name and then click on the Generate Temp token button. You'll get a temporary token that you can use in your app for testing.
Setting up the server
You'll need Node.js to set up an Express server. You can download Node.js from here. To test the server, I'll be using Postman to make requests to this server. You can download it from here.
Let's install Express using NPM.
npm install express
Now, we can import express in our code to create a simple server module that'll listen on port 3000.
const express = require("express");
const app = express();
app.use(express.json());

app.get("/", (req, res) => res.send("Agora Auth Token Server"));

const port = process.env.PORT || 3000;
app.listen(port, () => console.log(`Agora Auth Token Server listening at Port ${port}`));
You can start the server by running:
node index.js
This server will be listening on port 3000 and when you hit the '/' endpoint, it'll send "Agora Auth Token Server".
Generating authentication tokens
Agora provides the Real-time Communication (RTC) SDK and the Real-time Messaging (RTM) SDK. The agora-access-token package is used to generate tokens for both the SDKs.
The RTC SDK is used to enable real-time audio and video communications. With the help of the RTC SDK, developers can add audio/video call and audio/video broadcast functions in their projects. You can learn more about the RTC SDK here.
The RTM SDK is used for real-time messaging scenarios. The RTM SDK is in beta at the time of writing this article. You can learn more about the RTM SDK here.
Let's install the agora-access-token package.
npm install agora-access-token
Let's import this package into our code.
const Agora = require("agora-access-token");
You can refer to the documentation to generate a token here.
RTC token
Let's add a POST handler for a new endpoint called '/rtctoken' to generate authentication tokens for RTC Channels.
app.post("/rtctoken", (req, res) => {
  // Generate Token Here
});
When someone requests this endpoint, we'll generate an RTC authentication token and send it back to them.
The agora-access-token provides a class called RtcTokenBuilder that has a method called buildTokenWithUid.
The buildTokenWithUid method requires 6 arguments.
- App ID.
- App Certificate.
- Channel ID.
- User ID.
- User Role.
- Expiration Time.
We have the app ID and the app certificate from the project management console.
We'll get the channel ID and the user role from the request. You can learn more about the channel here. You can learn more about user roles here.
We'll generate a random user ID and set the expiration time for the token in the server.
Make sure the user ID you generate here is the same as the optional UID you pass to the SDK in the front-end while joining the channel.
const appID = "<-- Your app ID here -->";
const appCertificate = "<-- Your app certificate here -->";
Let's generate a random User ID. Agora accepts a 32-bit unsigned integer with a value ranging from 1 to (2^32-1) as the User ID. To make it simple, let's limit the range of the user ID to 100,000.
const uid = Math.floor(Math.random() * 100000);
Let's set the expiration time of the token. You need to provide a timestamp for the expiration time. We'll add the time (in seconds) to the current timestamp to set when we want the token to expire.
const expirationTimeInSeconds = 3600;
const currentTimestamp = Math.floor(Date.now() / 1000);
const privilegeExpiredTs = currentTimestamp + expirationTimeInSeconds;
There are two types of roles in a channel, a Publisher and a Subscriber.
A Publisher is someone who streams audio/video in the channel and also receives audio/video from other publishers.
A Subscriber will not be able to stream audio/video but can receive audio/video streams from publishers.
For example, in the case of a video conference, everyone is a publisher. But in the case of a livestream, only some users will be publishers while the others will be subscribers.
We should get whether the user is a publisher or subscriber in the request body. The agora-access-token provides constants for publisher and subscriber.
const role = req.body.isPublisher ? Agora.RtcRole.PUBLISHER : Agora.RtcRole.SUBSCRIBER;
We should also get the Channel ID from the request body.
const channel = req.body.channel;
Let's pass these data to buildTokenWithUid to generate the token.
const token = Agora.RtcTokenBuilder.buildTokenWithUid(appID, appCertificate, channel, uid, role, privilegeExpiredTs);
Now that we have the token, Let's return the user ID and the token as the response.
res.send({ uid, token });
Final Code:
app.post("/rtctoken", (req, res) => {
  const appID = "<-- Your app ID here -->";
  const appCertificate = "<-- Your app certificate here -->";
  const expirationTimeInSeconds = 3600;
  const uid = Math.floor(Math.random() * 100000);
  const role = req.body.isPublisher ? Agora.RtcRole.PUBLISHER : Agora.RtcRole.SUBSCRIBER;
  const channel = req.body.channel;
  const currentTimestamp = Math.floor(Date.now() / 1000);
  const expirationTimestamp = currentTimestamp + expirationTimeInSeconds;

  const token = Agora.RtcTokenBuilder.buildTokenWithUid(appID, appCertificate, channel, uid, role, expirationTimestamp);
  res.send({ uid, token });
});
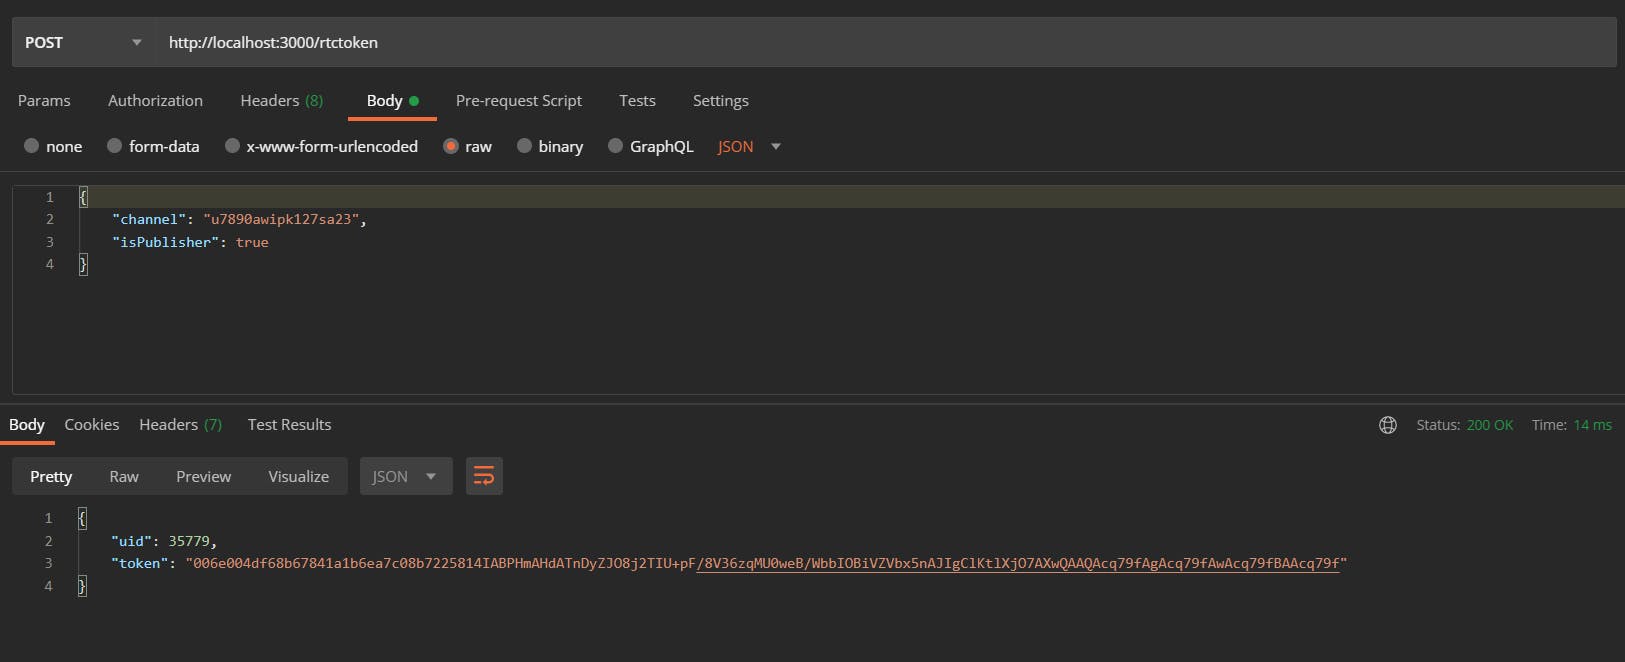
Let's request this endpoint to get the RTC token now.
Body of the request:
{
  "channel": "<-- Channel ID here -->",
  "isPublisher": "<-- True or False here -->"
}
Request & Response:
If you are using User Accounts instead of integer UIDs, you can use the
buildTokenWithAccountfunction instead of thebuildTokenWithUid. InbuildTokenWithAccount, you will pass the user account instead of the UID. Everything else remains the same. You can learn more about user accounts here.
Agora.RtcTokenBuilder.buildTokenWithAccount(appID, appCertificate, channel, userAccount, role, expirationTimestamp);
RTM token
Let's add a POST handler for a new endpoint called '/rtmtoken' to generate authentication tokens for the RTM SDK.
app.post("/rtmtoken", (req, res) => {
  // Generate Token Here
});
When someone requests this endpoint, we'll generate an RTM authentication token and send it as the response.
The agora-access-token provides a class called RtmTokenBuilder that has a method called buildToken.
The buildToken method requires 5 arguments.
- App ID.
- App Certificate.
- User Account.
- User Role.
- Expiration Time.
We have the app ID and the App Certificate from the project management console.
const appID = "<-- Your app ID Here -->";
const appCertificate = "<-- Your App certificate Here -->";
We should get the user account from the request. You can learn more about User Accounts here.
const userAccount = req.body.user;
Let's set the expiration time of the token. You need to provide a timestamp for the expiration time. We'll add the time (in seconds) to the current timestamp to set when we want the token to expire.
const expirationTimeInSeconds = 3600;
const currentTimestamp = Math.floor(Date.now() / 1000);
const privilegeExpiredTs = currentTimestamp + expirationTimeInSeconds;
There's only one role in RTM, that is an RTM User.
const role = Agora.RtmRole.Rtm_User;
Let's pass these data to buildToken to generate the token.
const token = Agora.RtmTokenBuilder.buildToken(appID, appCertificate, userAccount, role, privilegeExpiredTs);
Now that we have the token, let's return the token as the response.
res.send({ token });
Final Code:
app.post("/rtmtoken", (req, res) => {
  const appID = "<-- Your app ID here -->";
  const appCertificate = "<-- Your app certificate here -->";
  const user = req.body.user;
  const role = Agora.RtmRole.Rtm_User;
  const expirationTimeInSeconds = 3600;
  const currentTimestamp = Math.floor(Date.now() / 1000);
  const expirationTimestamp = currentTimestamp + expirationTimeInSeconds;

  const token = Agora.RtmTokenBuilder.buildToken(appID, appCertificate, userAccount, role, expirationTimestamp);
  res.send({ token });
});
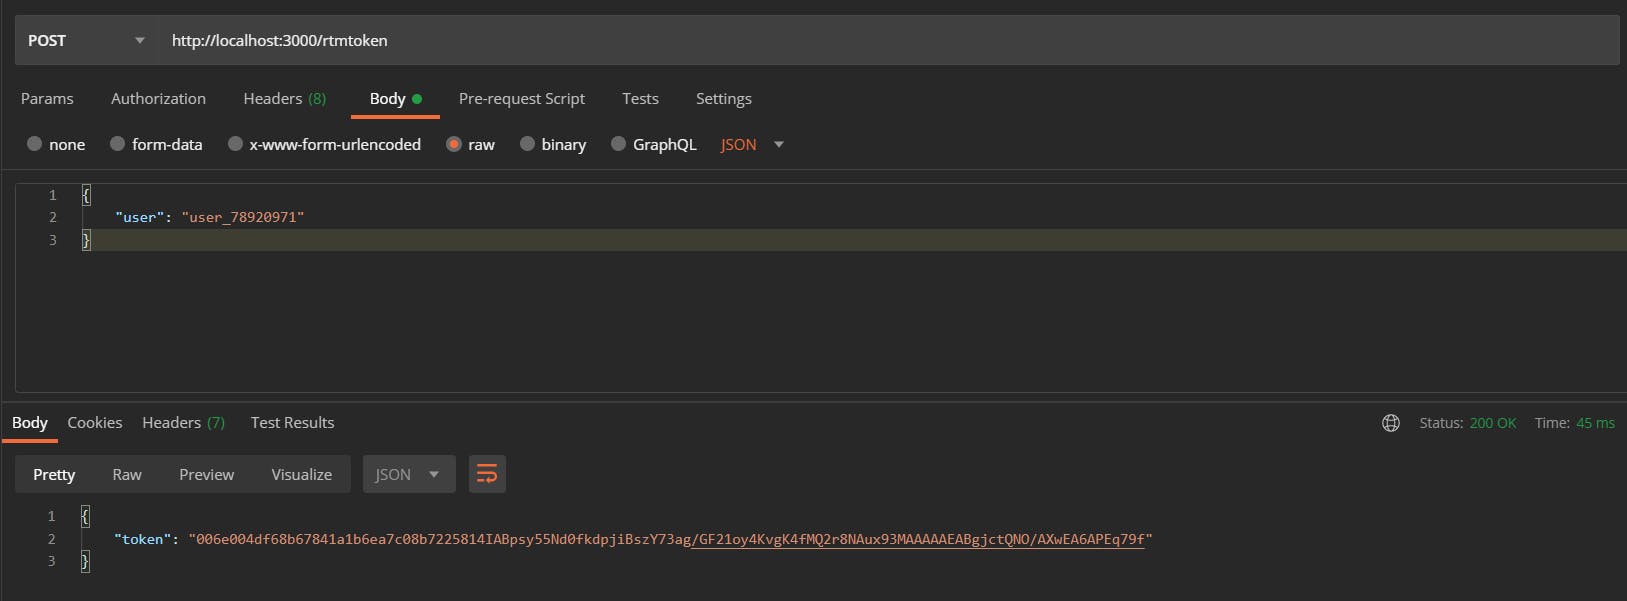
Let's request this endpoint to get the RTM token now.
Body of the request:
{
  "user": "<-- User Account here -->",
}
Request & Response:
Let's Recap
We learned about authentication mechanisms in Agora.
We created a project in Agora and copied the app ID and the app certificate.
We set up a simple Express server.
We added a POST handler to generate RTC authentication tokens using the
buildTokenWithUidmethod.We added a POST handler to generate RTM authentication tokens using the
buildTokenmethod.
Congratulations, :partying_face: You did it.
Happy Coding!
I do all my writing in my spare time, so if you feel inclined, a tip is always incredibly appreciated.
